BRENDA MALLEY | MAKING A WAVE IN OILS
online tutorial Summary
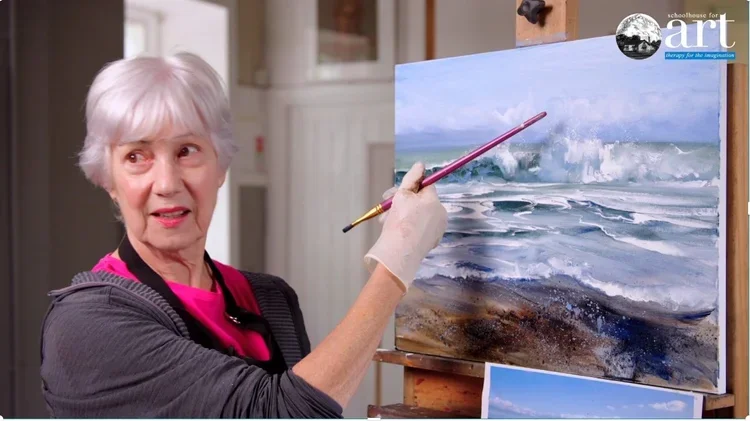
In this online course, learn to capture the dynamic energy of the sea with master artist Brenda Malley. Brenda will guide you through the entire process of creating a dramatic seascape, from the initial compositional sketch to the final, sparkling highlights.
You will learn to master a variety of techniques, from using brushes for soft, blended skies to employing the palette knife for textured foam and pebbly beaches. Brenda generously shares her professional methods, including how to mix the perfect water and sky colours, create a sense of light and shadow on the waves, and build up layers of paint for a realistic, vibrant effect.
This is a relaxing and immersive experience, allowing you to watch a professional artist at work and apply her techniques to your own painting. By the end, you will have the skills and confidence to bring the movement and beauty of the coast to life on your canvas.
Course Preview


Course FAQ
-
Brenda welcomes you into her creative process, showing you exactly how she:
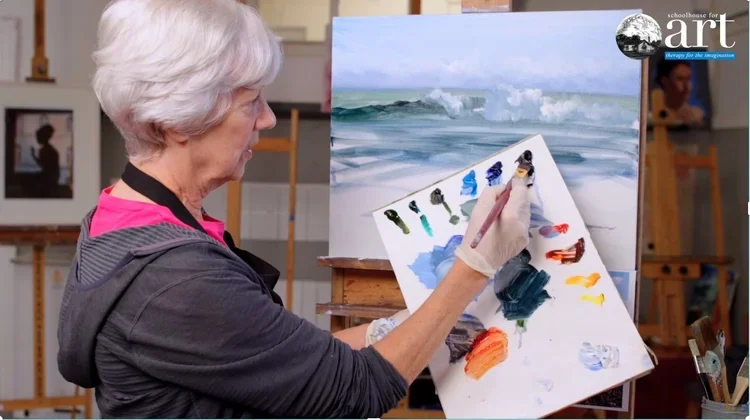
Sets Up Her Palette: She explains her logical system of arranging cool colours on one side and warms on the other, and shares her favourite paints, like the fast-drying Griffin Alkyd white that helps her work more quickly.
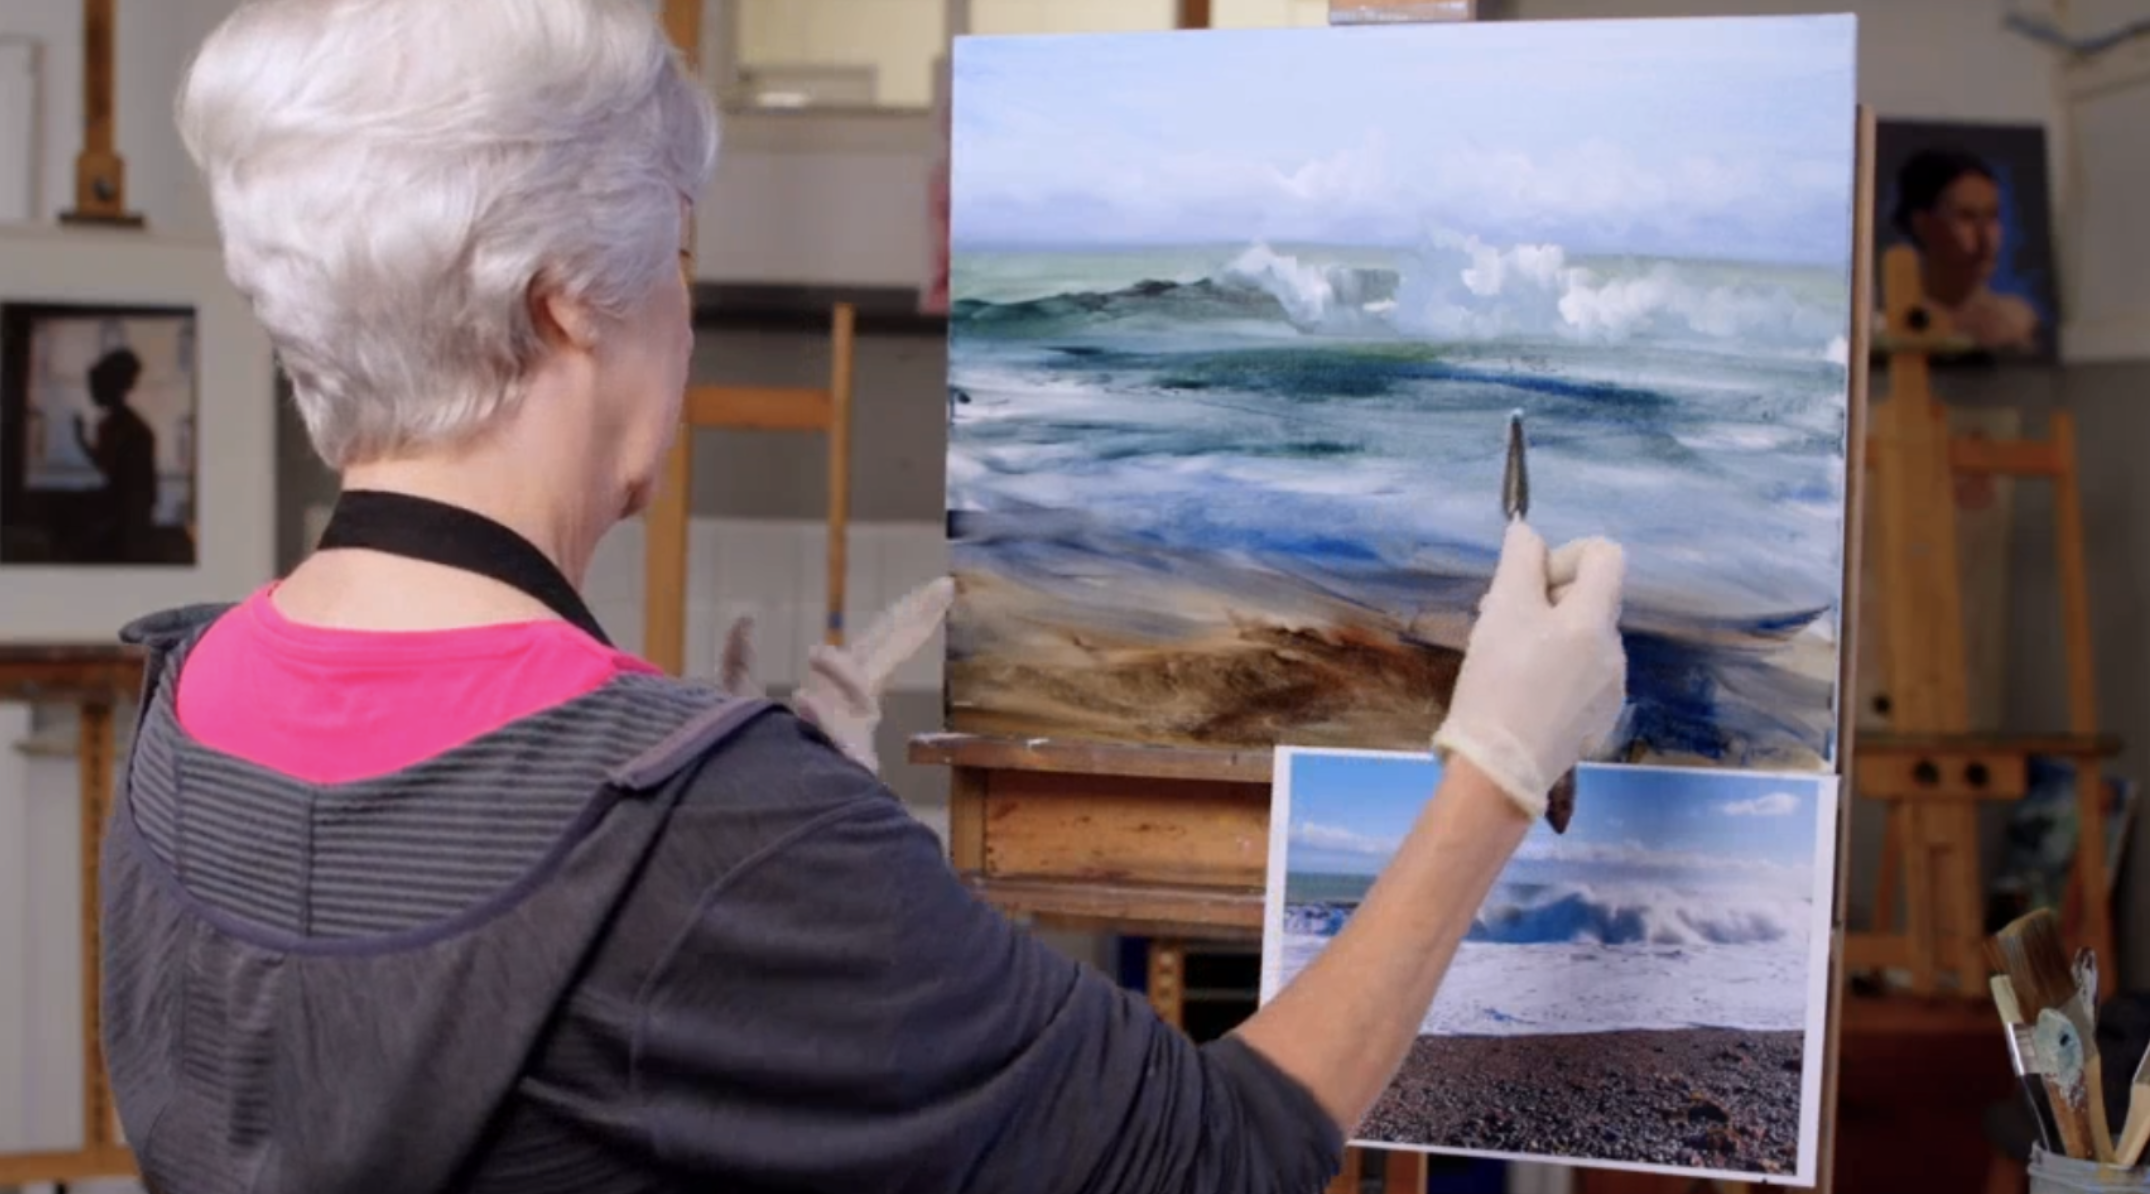
Thinks About Composition: Brenda reveals how she considers the composition before she even starts painting, explaining her thought process behind placing the horizon and the breaking wave to create a balanced and engaging scene.
Works in Layers: She patiently builds the painting passage by passage, teaching you her method for establishing the sky, the background sea, the wave, the foam, and the sand without the colours turning muddy.
Masters Her Tools: You'll see Brenda's signature techniques firsthand: using a soft brush for blending luminous clouds and a palette knife—which she considers like an extension of her "little finger"—for applying thick, textured foam that catches the light.
Adds the Final Magic: Brenda shows you her tricks for creating realism, like splattering paint for sea spray and pebbles, and demonstrates how to step back and make those crucial final adjustments to strengthen the painting.
-
Brenda is very specific about her materials, which helps you achieve the same effects she demonstrates.
1. Paints (Oil Colours)
Brenda uses a selection of cool and warm colours, arranged logically on her palette.
Blues:
Cerulean Blue
Ultramarine Blue
Indigo
Greens:
Sap Green
Viridian
Prussian Green
Warm Colours:
Cadmium Red
Burnt Sienna
Cadmium Yellow
Cadmium Yellow Light
White:
Griffin Alkyd White (This is her key recommendation because it's fast-drying, allowing you to work more quickly.)
2. Brushes
Type: Brenda uses acrylic brushes for their soft, springy flexibility.
Variety: A mixture of sizes, including some wider flats or filberts for washes and blending, and smaller rounds for details.
3. Palette Knives
Style: Two knives of the same shape but different sizes. She describes them as oval at the tip.
Usage: A small one for fine details and a larger one for applying broad areas of texture (like the foam).
4. Painting Mediums & Solvents
Odorless Solvent (Thinner): She uses Zest It (an odor-free brand) for thinning paints for initial washes and for cleaning brushes.
Clear Painting Medium: An oilier, richer medium used later in the painting process to improve flow and gloss.
5. Surfaces
A primed canvas or canvas board of your preferred size.
6. Other Essentials
Palette: A traditional wooden palette or a disposable paper palette for mixing colours.
Rags or Kitchen Towel: Essential for wiping brushes, correcting mistakes, and softening blends.
Containers: Two small jars or dippers for the solvent and the painting medium.
By gathering these materials, you'll be perfectly equipped to practice the techniques Brenda Malley so expertly demonstrates.
-
Basic understanding of oil painting required.
-
The course is composed of one video, a total of 33 mins. Enjoy the benefit of being able to watch and follow along at your leisure for the duration of your access.
-
What’s included in my purchase?
You’ll get unlimited access to this individual course, including all videos and supporting materials, for the full 3-month period.How does the 3-month access work?
This is a one-time payment that gives you access to the course for three months. There’s no automatic renewal - your access simply ends after the 3-month period.How do I access my course?
Once you’ve purchased the course, simply log in to your account at schoolhouseforart.com. Click on Account at the top right-hand side of the page, and your course will be available there.Can I extend my access after 3 months?
Yes! If you’d like continued access, you can purchase the course again at any time.What happens after 3 months?
Once the 3-month period is over, your access will expire. You won’t be charged again unless you choose to make another purchase.What if I only need access for a few weeks?
That’s fine. You’ll have access for the full 3 months, so you can move through the material at your own pace.Are refunds available?
We don’t offer refunds, but you’ll have access to the course for the full 3-month period you’ve paid for.Does this purchase give me access to other courses?
This purchase covers one individual course for 3 months. Other courses are available separately.Are there any technical requirements?
All you need is a stable internet connection and a modern web browser to enjoy the course.Can I share my access?
Course access is for individual use only and can’t be shared.Need help or having technical issues?
We’re happy to help. Just reach out to us at info@schoolhouseforart.com

YANNY PETTERS | WATERCOLOUR PAINTING BASICS
online tutorial Summary
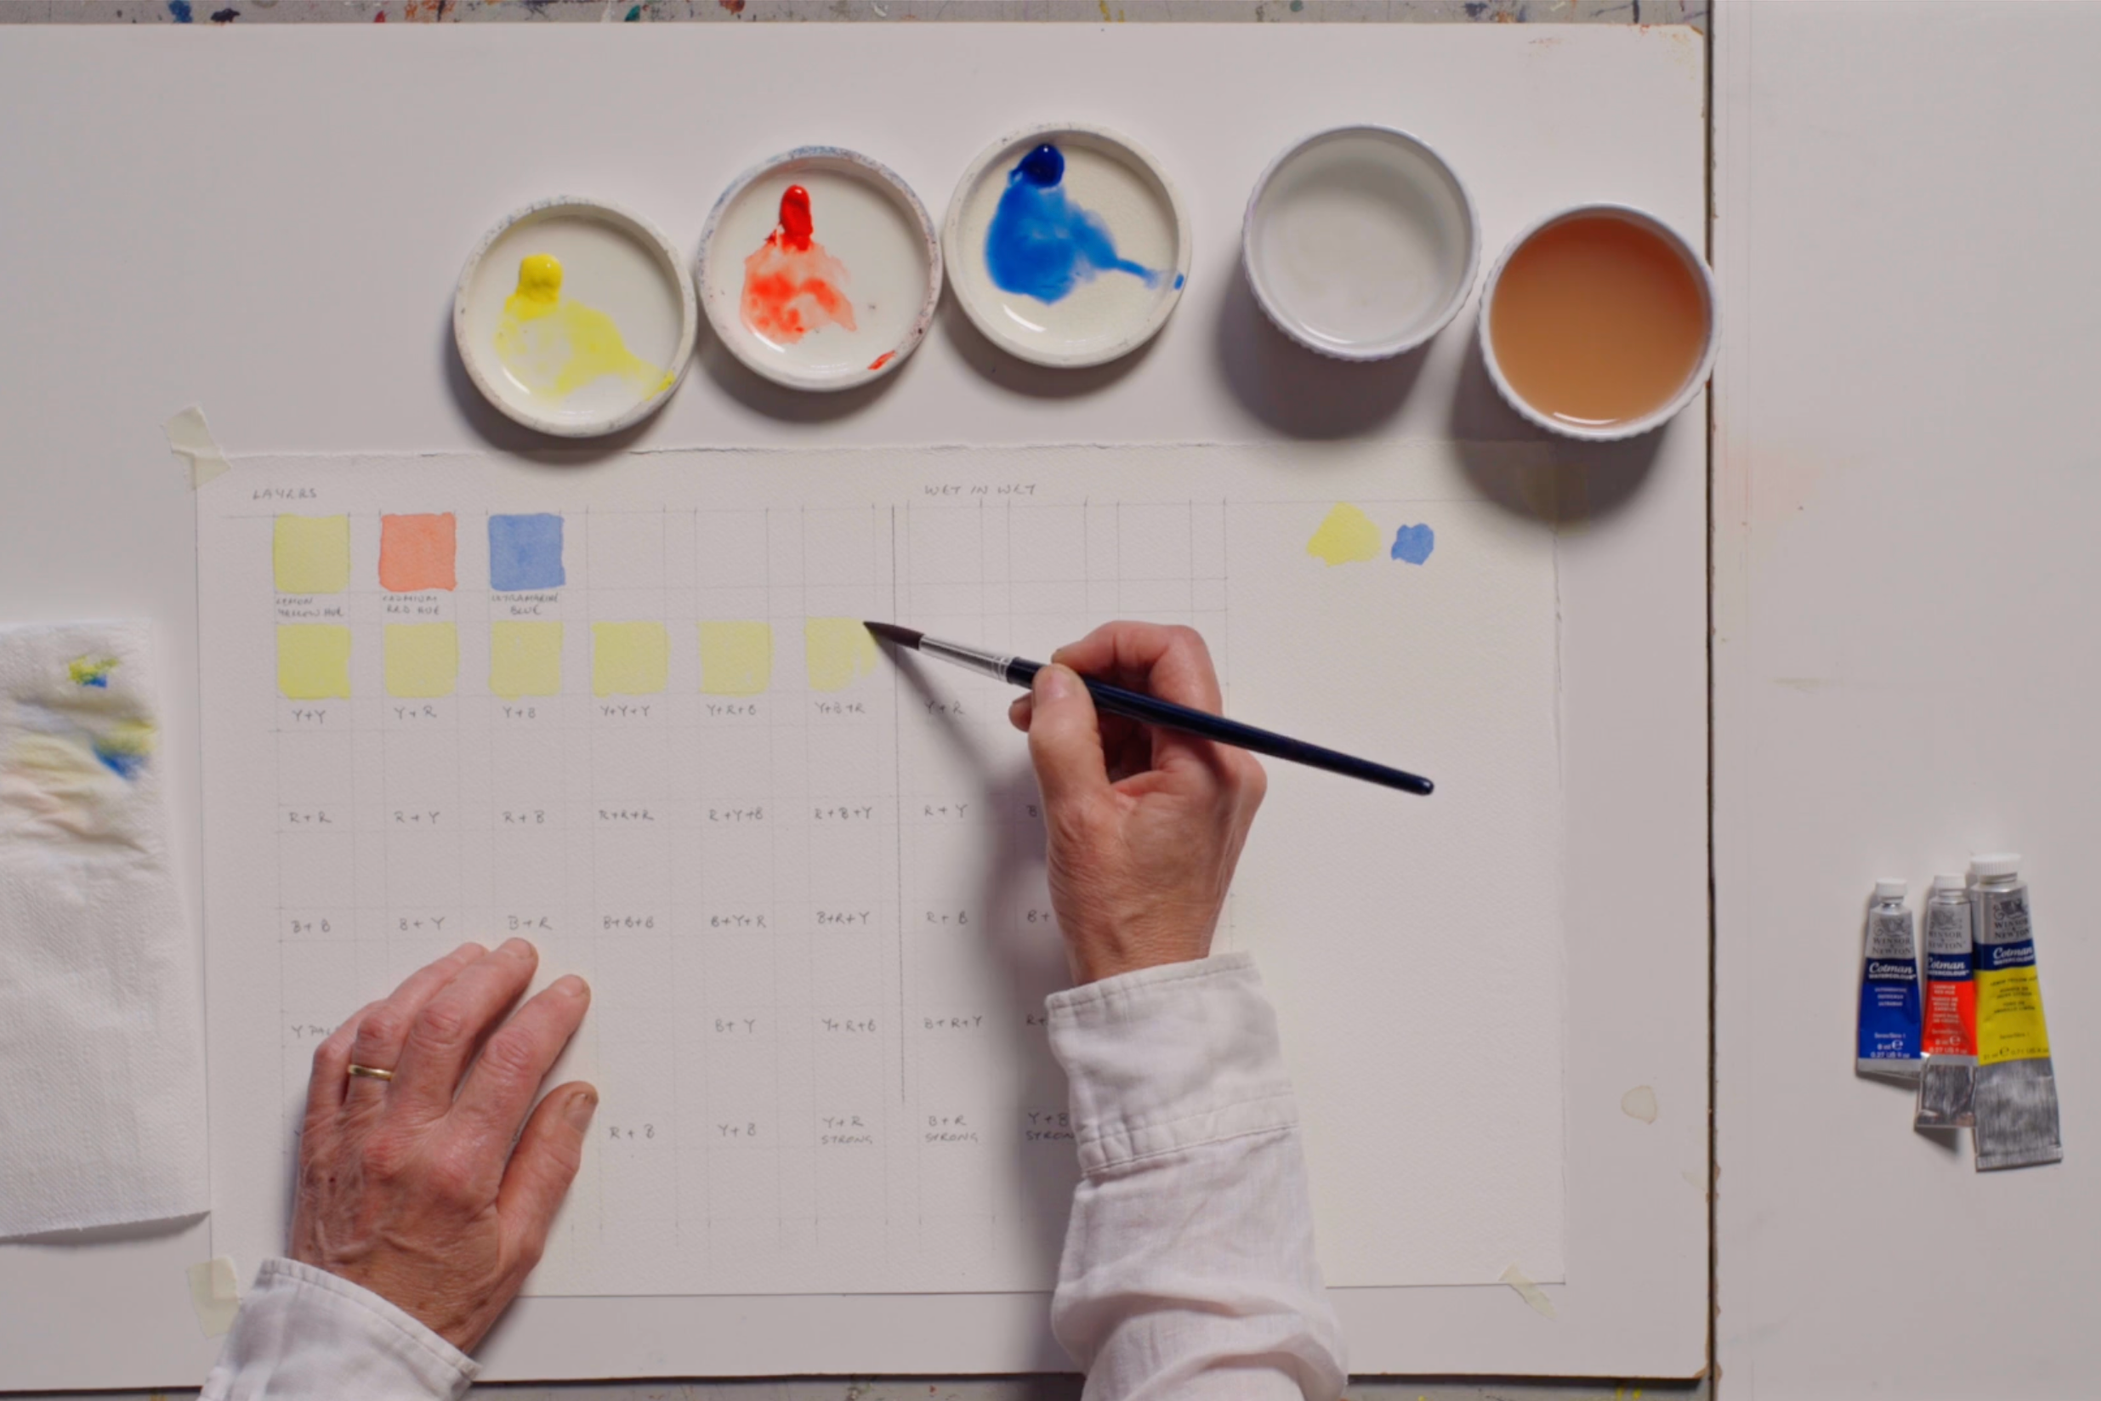
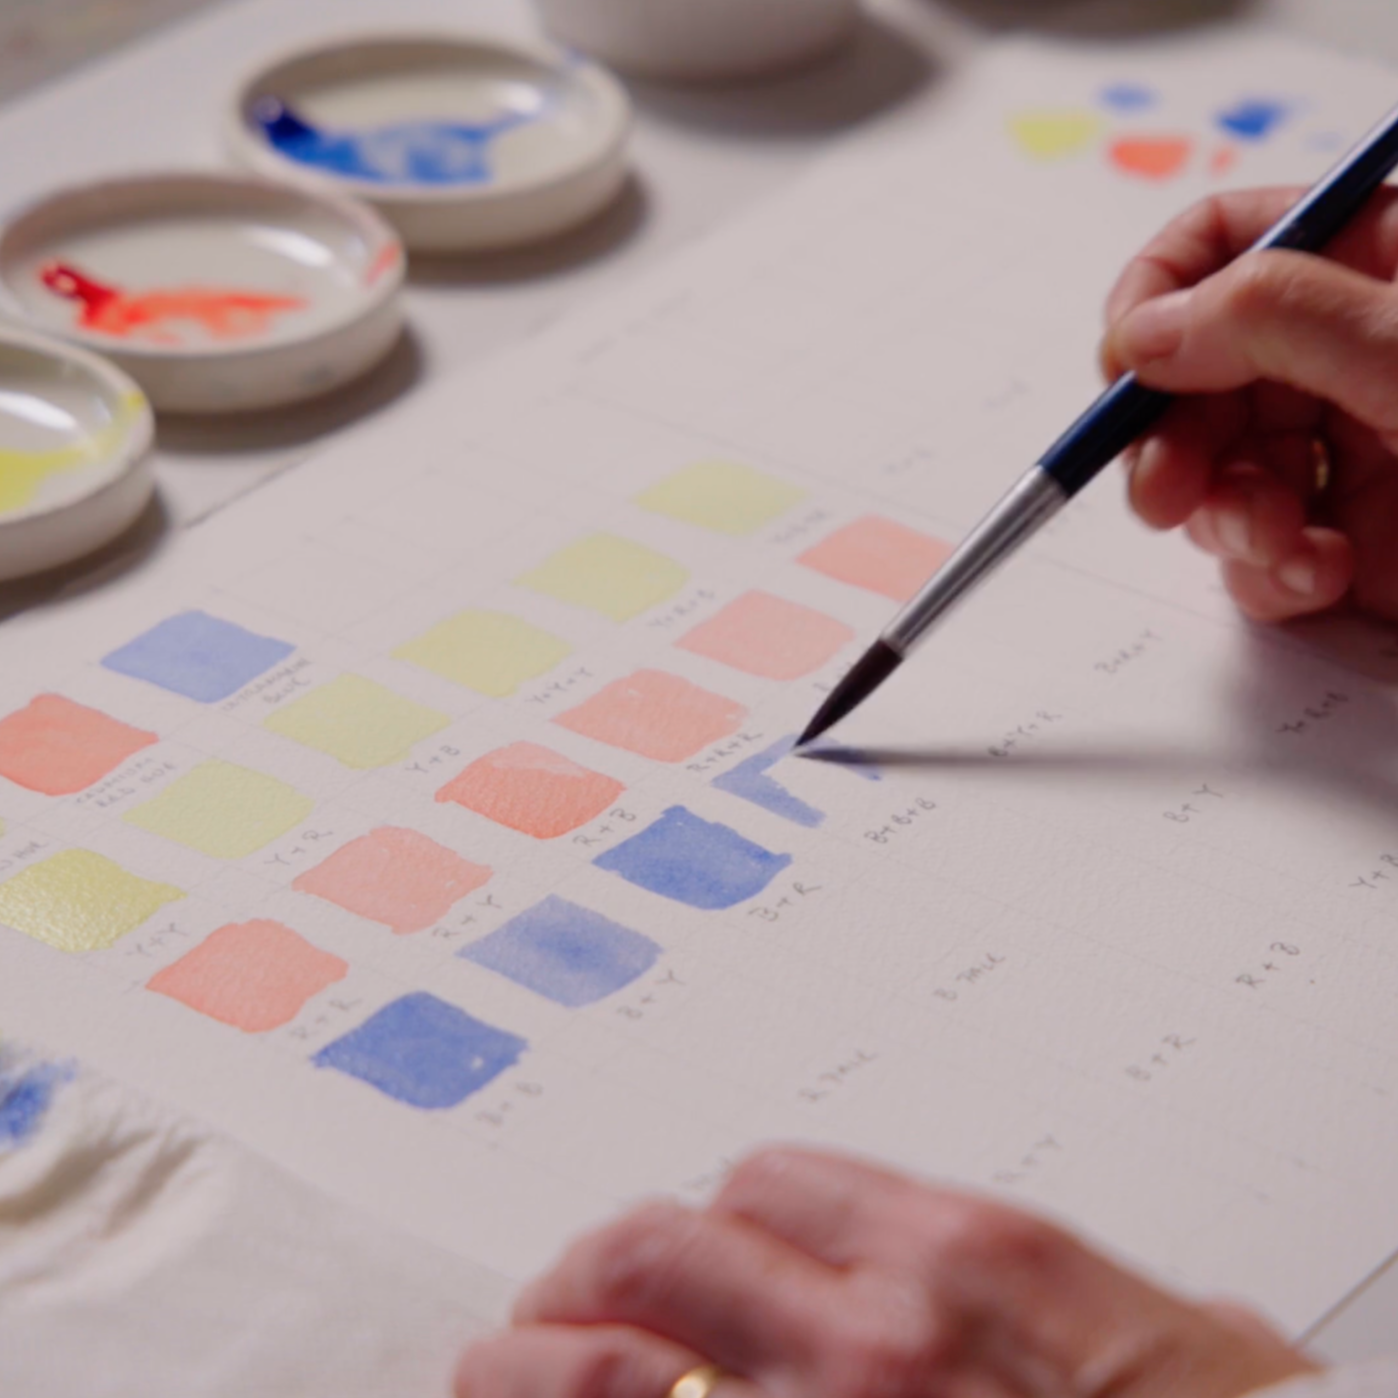
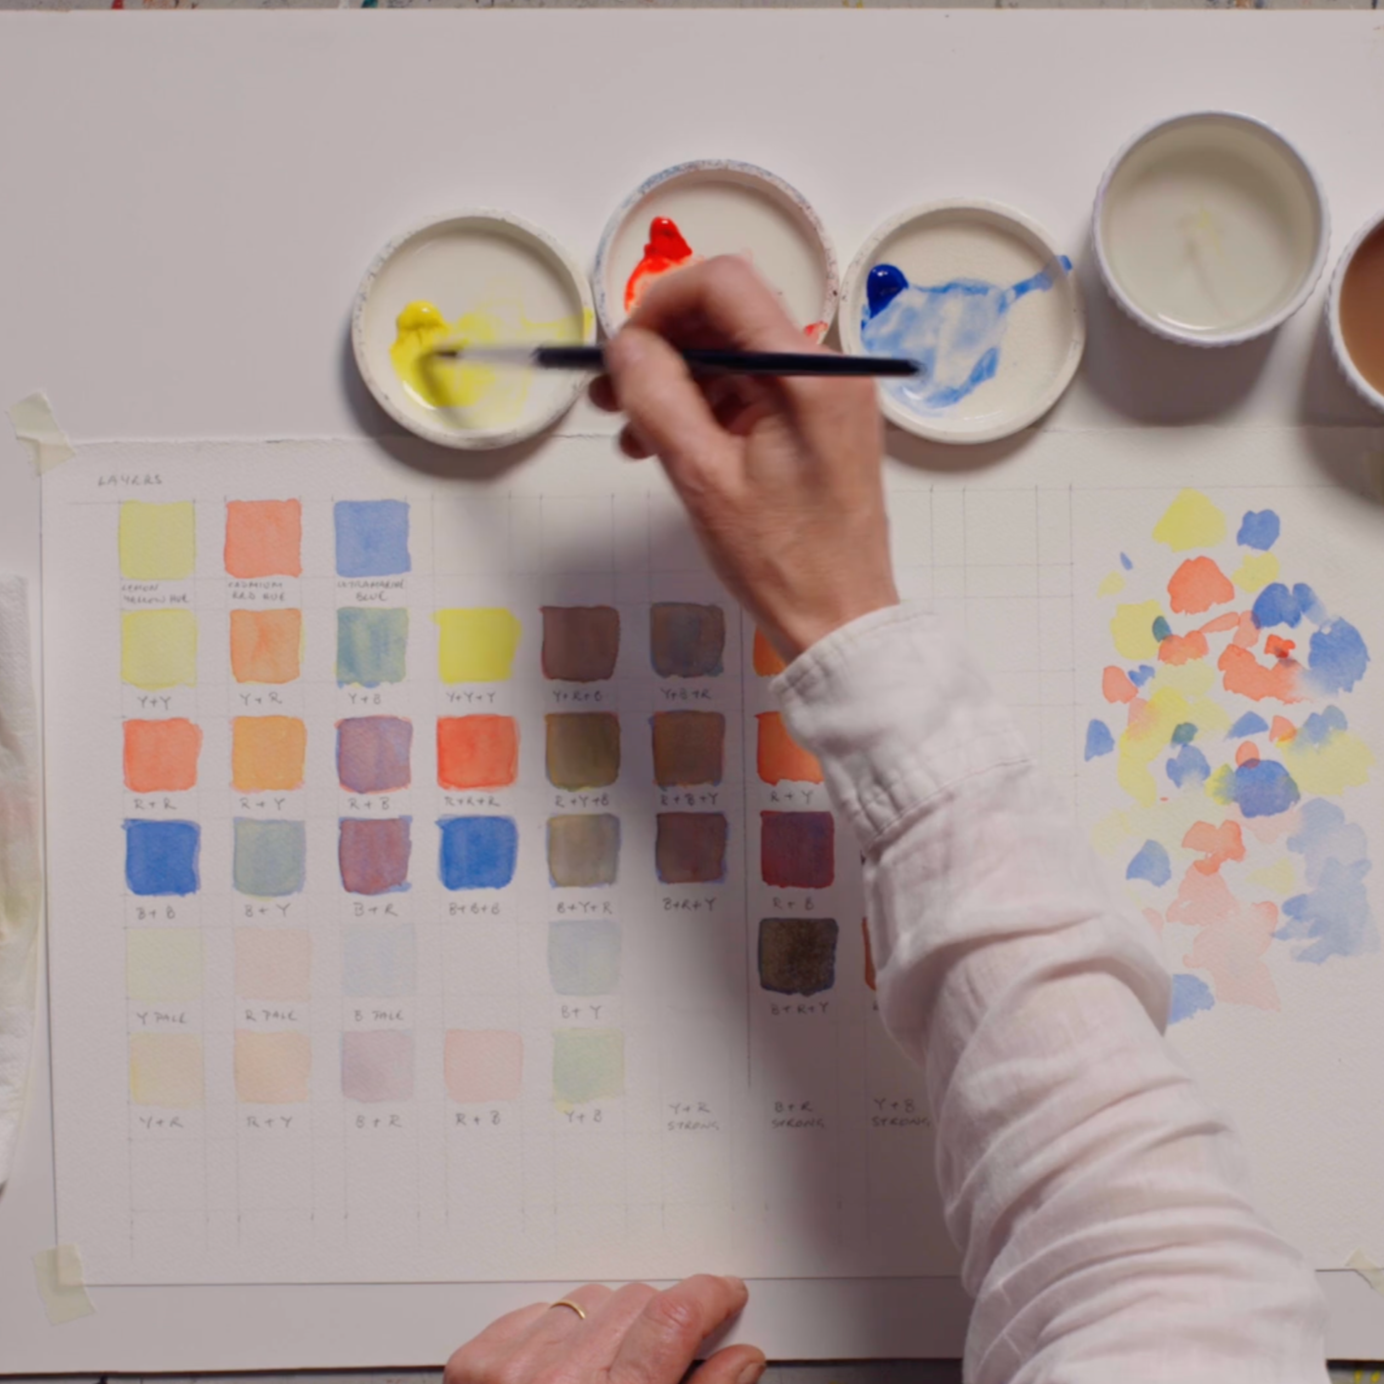
This course, led by botanical artist Yanny Petters, focuses on the fundamental skill of creating a vast colour range using only a limited palette of three primary colours: Lemon Yellow, Cadmium Red, and Ultramarine Blue.
You will learn to mix a complete spectrum through two primary methods. The first is layering, building up translucent glazes to create complex hues and deep, luminous colours. The second is wet-on-wet application, which allows for soft, organic blends directly on the paper.
The session provides essential techniques for controlling your medium, including how to manage the consistency of your paint and water to achieve everything from pale tints to saturated colours. This exercise is a practical foundation in colour theory and watercolour technique, designed to build your confidence and intentionality.
By the end, you will have created a personal colour reference and gained the skills to mix nuanced, vibrant colours for any subject, all from a minimal and strategic palette.
Course Preview

Course FAQ
-
Core Colour Theory: How to mix a complete colour spectrum using only a limited palette of three primary colours: Lemon Yellow, Cadmium Red, and Ultramarine Blue.
Fundamental Watercolor Techniques:
Layering (Glazing): Building complex, luminous colors and deep tones by applying translucent glazes, allowing each layer to dry completely.
Wet-on-Wet Application: Creating soft, organic blends and dynamic color transitions by mixing pigments directly on damp paper.
Paint & Water Control: How to master the paint-to-water consistency to achieve a full range of values, from the palest tints to highly saturated colors.
Practical Application & Observation: A foundational method for creating nuanced, vibrant greens and earthy browns that are more lively than their tube-made equivalents.
How to create a personal colour chart for future reference, understanding how colours shift from wet to dry.
-
Paints:
Lemon Yellow
Cadmium Red
Ultramarine Blue
Brushes:
A watercolour brush, such as a size 12 nylon brush.
Painting Surface:
Watercolour paper.
Palette & Mixing:
A palette or small dishes (like mixing bowls) for holding and mixing paint.
Two containers of water (one for cleaning, one for clean pigment).
Clean-Up & Control:
Tissues or paper towels for blotting brushes and controlling moisture.
-
Suitable for all levels.
-
The course is composed of one video, a total of 42 mins. Enjoy the benefit of being able to watch and follow along at your leisure for the duration of your access.
-
How does the 3-month access work?
This is a one-time payment that gives you access to the course for three months. There’s no automatic renewal - your access simply ends after the 3-month period.How do I access my course?
Once you’ve purchased the course, simply log in to your account at schoolhouseforart.com. Click on Account at the top right-hand side of the page, and your course will be available there.Can I extend my access after 3 months?
Yes! If you’d like continued access, you can purchase the course again at any time.What happens after 3 months?
Once the 3-month period is over, your access will expire. You won’t be charged again unless you choose to make another purchase.What if I only need access for a few weeks?
That’s fine. You’ll have access for the full 3 months, so you can move through the material at your own pace.Are refunds available?
We don’t offer refunds, but you’ll have access to the course for the full 3-month period you’ve paid for.Does this purchase give me access to other courses?
This purchase covers one individual course for 3 months. Other courses are available separately.Are there any technical requirements?
All you need is a stable internet connection and a modern web browser to enjoy the course.Can I share my access?
Course access is for individual use only and can’t be shared.Need help or having technical issues?
We’re happy to help. Just reach out to us at info@schoolhouseforart.com

BRENDA MALLEY | SEASCAPES IN OILS
online tutorial Summary
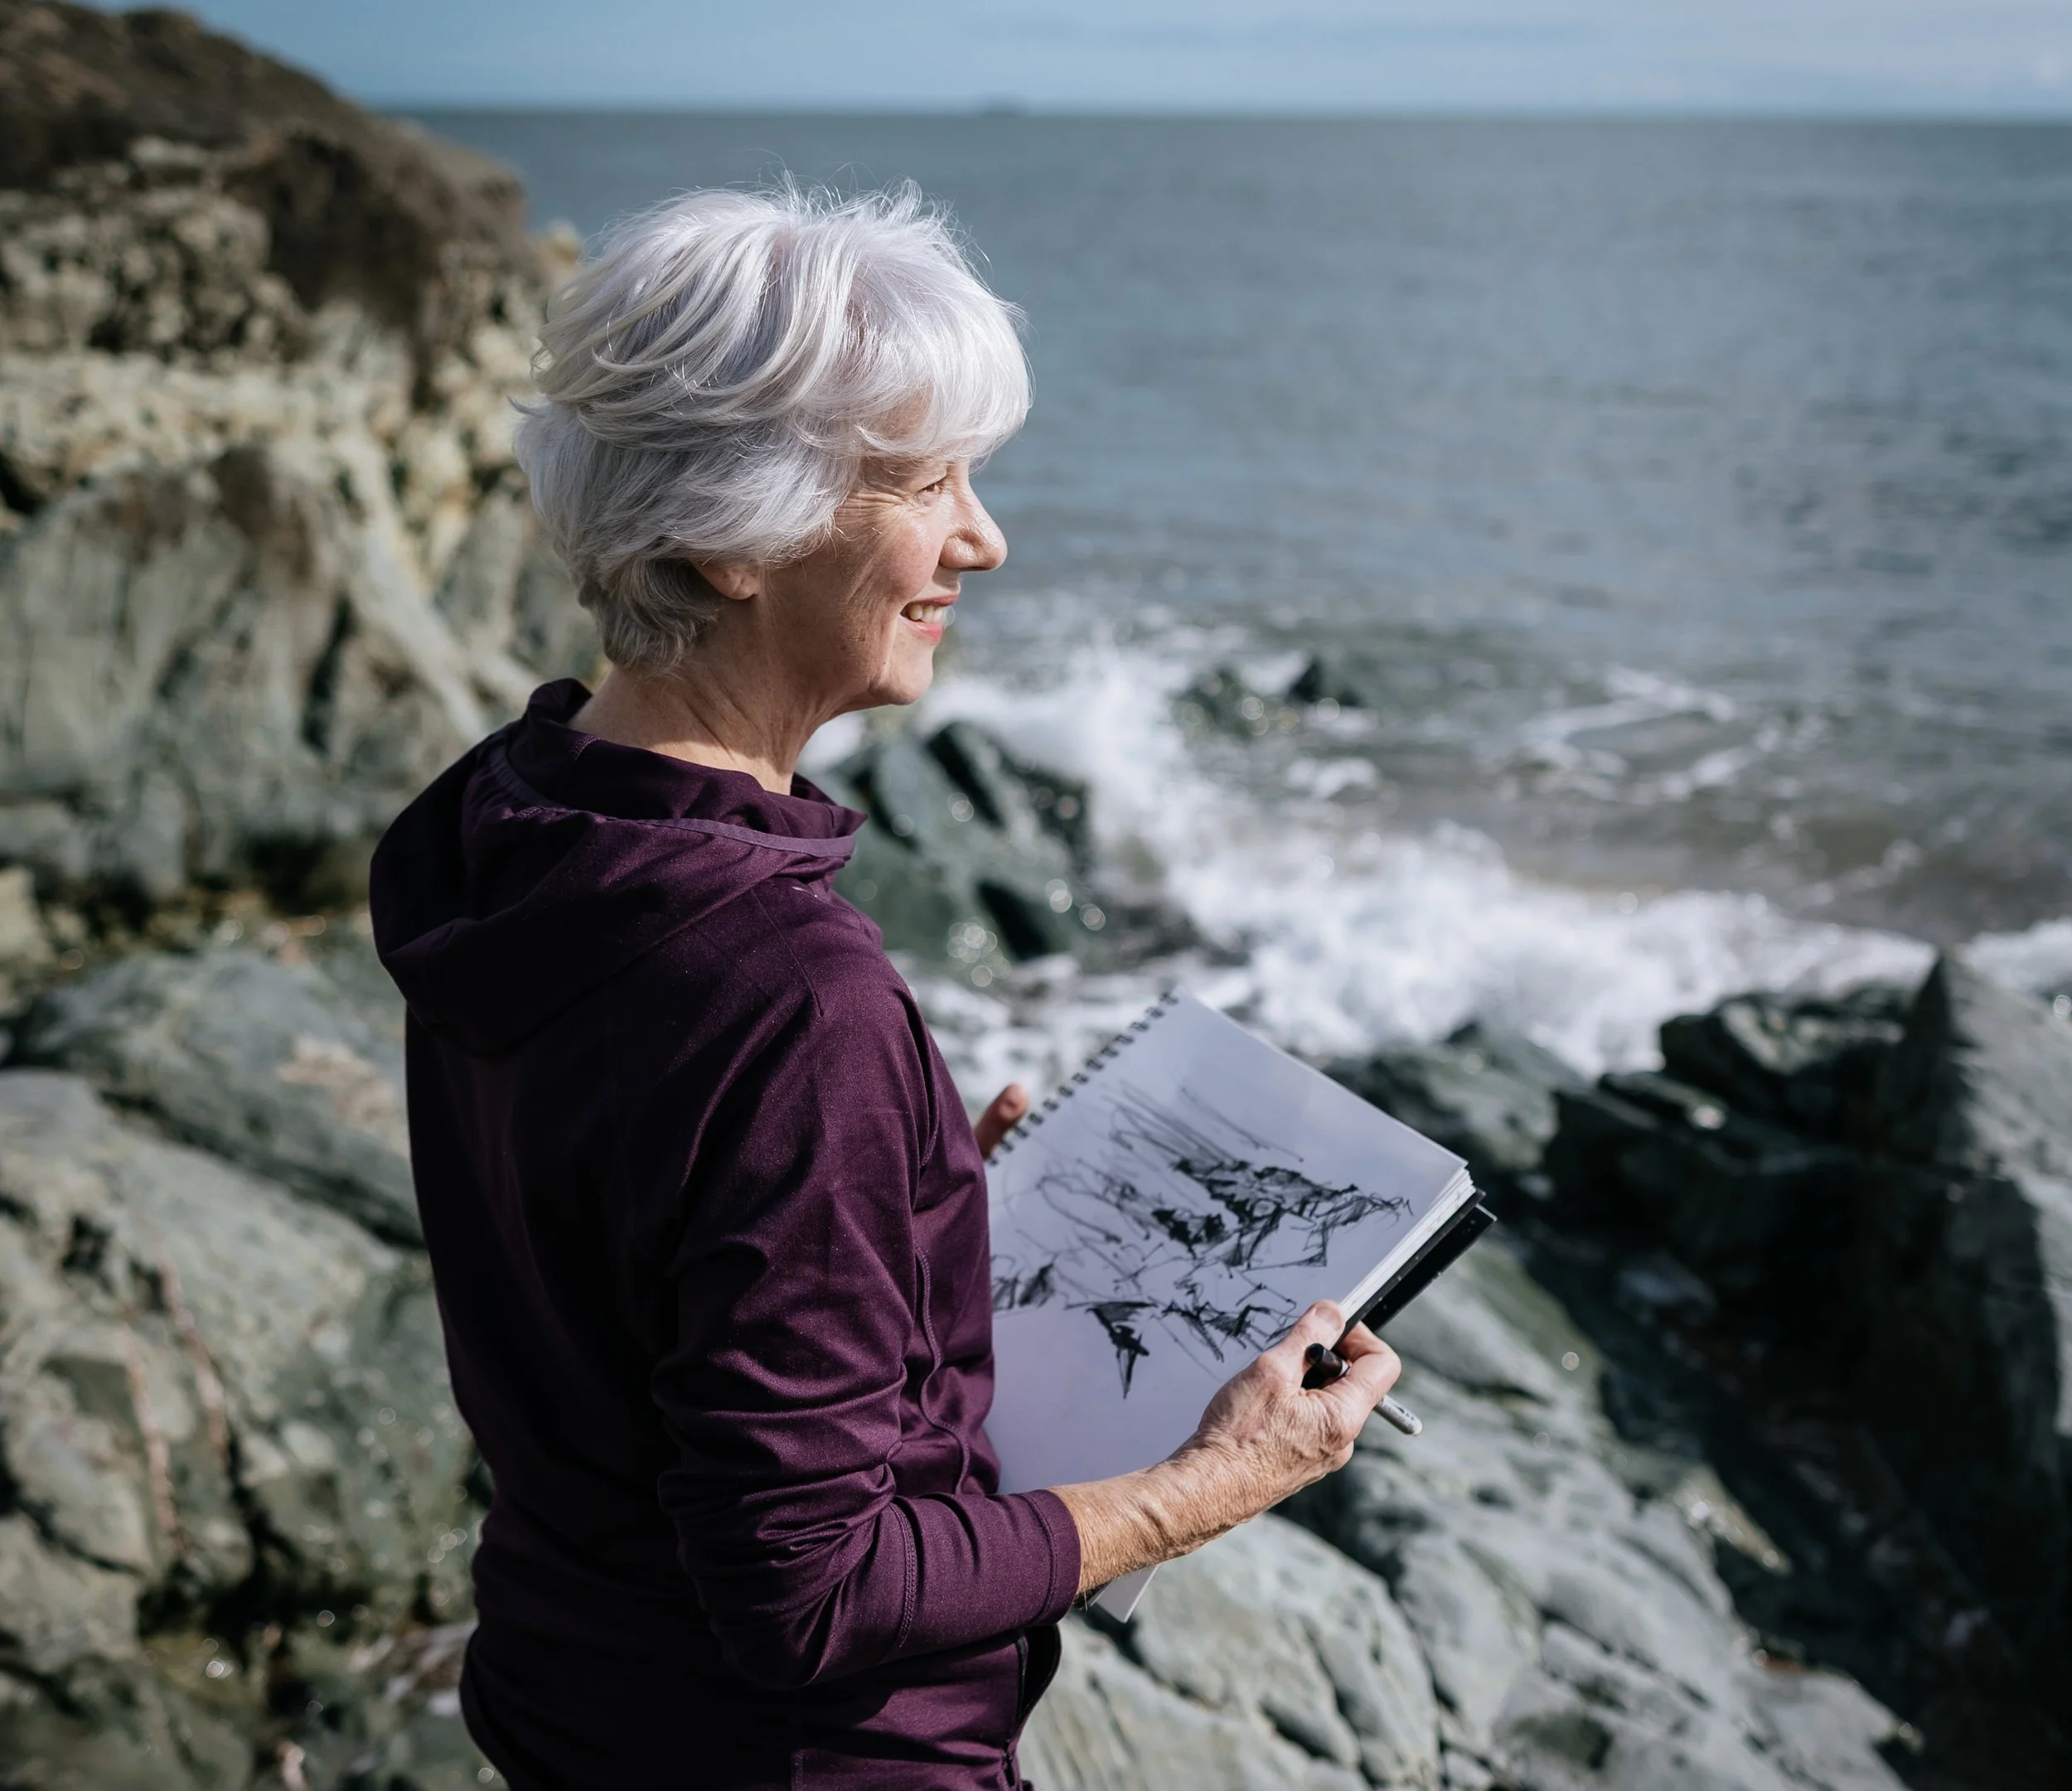
In this online course, learn how to paint dramatic seascapes with master artist Brenda Malley. A professional artist and instructor with over 20 years of experience, Brenda specialises in capturing the vitality and energy of landscapes using oils and a palette knife.
In this course, Brenda offers broad instruction on all aspects of developing a painting, with a special focus on using the palette knife for loose, spontaneous effects. It’s a fun and relaxing approach perfectly suited for artists who want to “loosen up” their style.
Brenda will guide you through her entire process with a full demonstration, sharing step-by-step insights into her approach. You can then settle into your own creative space and paint along using the same reference or one of your own choosing.
Course Preview


Course FAQ
-
Develop your landscape and seascape painting skills in a relaxed, supportive environment.
Learn how to “loosen up” your painting style using a palette knife for expressive, spontaneous effects.
Receive broad instruction on all stages of painting development, from composition to finishing touches.
Watch step-by-step demonstrations of Brenda’s approach to painting, with practical guidance throughout.
Work from the same reference as the tutor or choose your own subject matter.
Best suited for artists with some experience – not suitable for complete beginners.
-
Surface to paint on - canvas, board or oil paper, any size
Palette - I use disposable palette pads for mixing paint
Brushes - I prefer flexible acrylic brushes, various sizes
Palette Knife - oval shape
Thinner - Must be odour free - Zest It or Sansodor
Liquin - for thicker paint application, glazing and fast drying
Paint My 12 essential colours - Titanium White - Ultramarine Blue - Cerulean Blue (hue) - Cadmium Red (hue) - Magenta - Cadmium Yellow (hue) - Cadmium Yellow Pale (hue) - Viridian - Sap Green - Burnt Sienna - Raw Umber - Indigo or Payne’s Grey
I usually use the Winton brand. Indigo is only available in Winsor and Newton artist quality I also like to use Raw Umber Light. Available in artist quality only and not essential.
Kitchen Towels
Containers - 2 small jars or dippers for your thinner - one to thin your paint, one to clean your brushes
Latex Gloves - optional
-
Basic understanding of oil painting required.
-
The course is composed of two videos, a combined total of 48 mins. Enjoy the benefit of being able to watch and follow along at your leisure for the duration of your access.
-
How does the 3-month access work?
This is a one-time payment that gives you access to the course for three months. There’s no automatic renewal - your access simply ends after the 3-month period.How do I access my course?
Once you’ve purchased the course, simply log in to your account at schoolhouseforart.com. Click on Account at the top right-hand side of the page, and your course will be available there.Can I extend my access after 3 months?
Yes! If you’d like continued access, you can purchase the course again at any time.What happens after 3 months?
Once the 3-month period is over, your access will expire. You won’t be charged again unless you choose to make another purchase.What if I only need access for a few weeks?
That’s fine. You’ll have access for the full 3 months, so you can move through the material at your own pace.Are refunds available?
We don’t offer refunds, but you’ll have access to the course for the full 3-month period you’ve paid for.Does this purchase give me access to other courses?
This purchase covers one individual course for 3 months. Other courses are available separately.Are there any technical requirements?
All you need is a stable internet connection and a modern web browser to enjoy the course.Can I share my access?
Course access is for individual use only and can’t be shared.Need help or having technical issues?
We’re happy to help. Just reach out to us at info@schoolhouseforart.com

YANNY PETTERS | DANDELIONS IN WATERCOLOURS
online tutorial Summary
Join artist Yanny Petters for a fascinating journey into botanical watercolour painting. Using the vibrant yet forgiving medium of watercolour, Yanny will show you how to create a stunning range of hues using just three primary colours. She will guide you through the entire process, beginning with how to create a careful and precise drawing from a photo reference. You'll then discover the secrets of mixing a beautiful, naturalistic array of greens for the stem and leaves, and earthy browns for the core, directly on your paper.
A key focus of the class is mastering the unique properties of watercolour. You will learn how to build up delicate, translucent layers of paint to capture the flower's ethereal lightness and create a sense of depth and luminosity. Yanny will share professional tips for controlling washes, preserving white space for highlights, and adding those final, defining details that make your botanical painting truly pop with life. This is the perfect class for anyone who loves nature and wants to capture its delicate beauty in a simple, rewarding, and meditative way.
Course Preview


Course FAQ
-
The Drawing Foundation: How to trace a photo reference and transfer a clean, faint outline onto your watercolour paper.
Limited Palette Magic: How to mix a wide spectrum of realistic greens, browns, and tones using only yellow, red, and blue.
Layered Watercolour Technique: The process of building depth and colour by applying thin, glazed layers, allowing each to dry completely.
Botanical Accuracy: How to observe and paint plant structures like stems and leaves to show their form and dimension.
Adding Fine Details: Techniques for using a water-soluble pencil to add sharp, final details and definition without outlining.
Correcting Mistakes: How to lift colour with a damp brush to correct errors or create highlights, like the dandelion's fluffy seeds.
-
Paints: A limited palette of three primary colours: Lemon Yellow, Cadmium Red, and Ultramarine Blue (Artist's quality, like Winsor & Newton Cotman).
Brushes: A variety of round nylon brushes (e.g., size 2, 5/6, and 12) and one small flat brush (e.g., size 4) for lifting colour.
Pencils: Both hard (HB) and soft (2B) graphite pencils, plus a sepia water-soluble pencil (e.g., Derwent Inktense).
Paper: Hot-pressed watercolour paper (smooth surface) for the final painting, and spare paper for testing colours.
Other Essentials: Two jars of water, absorbent tissue/paper towels, a sharpener, a kneaded (putty) eraser, and low-tack tape.
Transfer Tools: Tracing paper and a photo reference of your subject.
-
Suitable for all levels - good understanding of the basic use of watercolour would be an advantage.
-
The course is composed of three videos, a combined total of 97 mins. Enjoy the benefit of being able to watch and follow along at your leisure for the duration of your access.
-

ÁINE DIVINE | FLOWERS IN MIXED MEDIA
online tutorial Summary
Join artist Áine Divine for an inspiring course on expressive mixed media. This course is a liberating journey into capturing the vibrant energy of a floral arrangement, moving beyond botanical accuracy to convey feeling and movement.
Áine will guide you in building a painting with bold, intuitive marks. She begins by establishing a foundation with large brushes, quickly blocking in backgrounds and key shapes. Áine’s core philosophy is to maintain a sense of play, encouraging artists to work with vigour and embrace happy accidents. She demonstrates a "push and pull" method, building up layers of paint and then excavating them to reclaim light, keeping the entire surface alive and evolving.
Students will learn to cohesively use a rich toolkit to create depth and texture. The focus is on working decisively, mixing colours by eye, and using tools like stencils to add interest without losing spontaneity.
Perfect for those looking to loosen their style, this course is an invitation to experiment boldly, build confidence, and experience the pure joy of painting with freedom.
Course Preview


Course FAQ
-
A Bold and Energetic Start: How to begin your painting with confidence and freedom, focusing on the big shapes and movement instead of getting stuck on small details.
Simple Colour Mixing: Easy techniques for mixing the colours you see, including how to soften bright colours to create beautiful, natural-looking tones.
Fun with Paint & Texture: How to use the unique properties of acrylic paint to create interesting effects, from dry-brush marks to lifting wet paint to bring back highlights.
Embracing Happy Accidents: Learn to use drips and runs to your advantage, making them a creative part of your artwork.
Easy Mixed-Media Techniques: Simple ways to combine different materials like stencils, collage, oil pastels, and inks for depth and detail.
Designing Your Painting: How to arrange elements to create a balanced composition, moving things around to make a better painting.
The Layering Process: A simple "add and subtract" method of building your painting by laying down colours and refining shapes.
Defining Flowers with Simple Shapes: Learn to see and paint the dark spaces between petals and leaves to make your flowers pop.
Creating Form with Light and Shadow: Mix simple grey and muted tones to show which petals are in shadow, giving your flowers a realistic feel.
Using "Character Marks": Learn easy tricks and signature marks that instantly make a flower look like a gerbera, daisy, or lily.
Making Final Decisions: How to assess your painting and make decisive moves to bring it to a satisfying finish.
Knowing When to Stop: How to find a "resolution" rather than perfection, leaving the painting feeling lively and complete.
-
Paints, Inks & Pastels
Acrylic Paints:
Cadmium Yellow
Yellow Ochre
Cadmium Orange
Cadmium Red
Magenta
Titanium White (Fluid Acrylic is also used)
Ultramarine Blue
Hooker's Green
Sap Green
Van Dyke Brown
High-Flow Acrylic Inks:
Fluorescent Red
Fluorescent Orange
Phthalo Turquoise
Oil Pastels: Sennelier brand (recommended for good coverage), including White, Orange, Red, Crimson, Yellow, and a dark Indigo/Black.
Indian Ink: In a small pot for drawing.
Brushes & Tools
Brushes (Royal & Langnickel "Burgundy" set recommended):
Wide, flat brushes (2-inch and 1-inch, including a slanted one)
Smaller round and flat brushes for detail
A 3-inch brush for covering large areas
Palette: Tear-off palette sheets.
Stencils: A variety of foliage and pattern stencils.
Adhesives: Pritt Stick (glue stick) and PVA (Wood) Glue.
Drawing Tool: A sharpened stick or the applicator from an old ink bottle for drawing with Indian ink.
Surfaces & Supports
Paper: Shirt Card (cardstock with a shiny side and a matte side; the shiny side is used for its manipulability).
Easel: An adjustable, upright easel.
Collage Materials
Papers: Torn pieces from old paintings, wrapping paper, patterned tissue paper (e.g., eucalyptus pattern), and pre-painted papers.
Card: For dipping into paint to create specific marks.
Additional Materials
Masking Tape
Water Container
Kitchen Paper / Paper Towels (white, to see colours clearly)
Spray Bottle (for water)
-
Suitable for all levels - good understanding of the basic use of watercolour would be an advantage.
-
The course is composed of three videos, a combined total of 98 mins. Enjoy the benefit of being able to watch and follow along at your leisure for the duration of your access.
-
How does the 3-month access work?
This is a one-time payment that gives you access to the course for three months. There’s no automatic renewal - your access simply ends after the 3-month period.How do I access my course?
Once you’ve purchased the course, simply log in to your account at schoolhouseforart.com. Click on Account at the top right-hand side of the page, and your course will be available there.Can I extend my access after 3 months?
Yes! If you’d like continued access, you can purchase the course again at any time.What happens after 3 months?
Once the 3-month period is over, your access will expire. You won’t be charged again unless you choose to make another purchase.What if I only need access for a few weeks?
That’s fine. You’ll have access for the full 3 months, so you can move through the material at your own pace.Are refunds available?
We don’t offer refunds, but you’ll have access to the course for the full 3-month period you’ve paid for.Does this purchase give me access to other courses?
This purchase covers one individual course for 3 months. Other courses are available separately.Are there any technical requirements?
All you need is a stable internet connection and a modern web browser to enjoy the course.Can I share my access?
Course access is for individual use only and can’t be shared.Need help or having technical issues?
We’re happy to help. Just reach out to us at info@schoolhouseforart.com

SINEAD LAWLESS| INDIRECT PAINTING
online tutorial Summary
Join artist Sinead Lawless for a foundational journey into the art of oil painting. This course demystifies the flexible, forgiving medium used by masters for centuries. You will master the core "indirect method," learning to build a painting through deliberate layers.
Begin by creating a detailed tonal underpainting, learning to mix values, tone your canvas, and establish a strong composition in black and white. Then, refine your work by applying values dark to light, defining details, and using essential techniques like scraping back and blending edges. This process culminates in a finished monochromatic study, providing the perfect technical foundation for all your future color work. Build the skills and confidence to create beautiful, lasting artwork.
Course Preview


Course FAQ
-
The blocking-in process: How to apply pre-mixed grey values from dark to light to build form and volume.
Brushwork techniques: How to load your brush and apply paint effectively, and when to switch to smaller brushes for detail.
Working dark to light: The fundamental oil painting approach of establishing shadows first and adding highlights last.
Maintaining clean colours: The critical practice of thoroughly cleaning your brush between values to avoid muddy mixtures.
Making corrections: How to use a palette knife to scrape away paint and redefine shapes for accurate drawing.
Managing edges: The final step of blending with a clean, dry brush to create soft transitions and hard edges, enhancing the sense of three-dimensional form.
The complete workflow: From a basic tonal wash to a finished, detailed monochromatic underpainting ready for colour glazing.
-
Paints:
Titanium White
Ivory Black
Brushes:
A range of flat brushes in different sizes (e.g., sizes 2, 4, and 6 are used in the demo).
Painting Surface:
Canvas paper or oil paper pad (specifically designed for oils; do not use cartridge paper).
A primed canvas or panel would also be suitable.
Palette & Mixing:
A flat palette made of wood, glass, or disposable paper. (Palettes with compartments are not suitable).
Palette Knife for clean mixing and scraping.
Solvents & Mediums:
Solvent such as Gamsol, Sansodor, or a plant-based alternative (like Michael Harding's Miracle Medium base).
A jar for the solvent.
Rags & Clean-Up:
Rags or paper towels for cleaning brushes, wiping the palette knife, and removing excess paint from the canvas.
Key Techniques & Tips Mentioned:
Solvent is used sparingly, only for the initial toning wash and drawing. The rest of the underpainting uses paint with no medium.
The palette should be a neutral tone (not white) for accurate value judgment.
Do not use your best brushes for the initial drawing/toning stage, as it can be rough on the hairs.
-
Suitable for all levels - good understanding of the basic use of oil painting would be an advantage.
-
The course is composed of two videos, a combined total of 47 mins. Enjoy the benefit of being able to watch and follow along at your leisure for the duration of your access.
-
How does the 3-month access work?
This is a one-time payment that gives you access to the course for three months. There’s no automatic renewal - your access simply ends after the 3-month period.How do I access my course?
Once you’ve purchased the course, simply log in to your account at schoolhouseforart.com. Click on Account at the top right-hand side of the page, and your course will be available there.Can I extend my access after 3 months?
Yes! If you’d like continued access, you can purchase the course again at any time.What happens after 3 months?
Once the 3-month period is over, your access will expire. You won’t be charged again unless you choose to make another purchase.What if I only need access for a few weeks?
That’s fine. You’ll have access for the full 3 months, so you can move through the material at your own pace.Are refunds available?
We don’t offer refunds, but you’ll have access to the course for the full 3-month period you’ve paid for.Does this purchase give me access to other courses?
This purchase covers one individual course for 3 months. Other courses are available separately.Are there any technical requirements?
All you need is a stable internet connection and a modern web browser to enjoy the course.Can I share my access?
Course access is for individual use only and can’t be shared.Need help or having technical issues?
We’re happy to help. Just reach out to us at info@schoolhouseforart.com

SINEAD LAWLESS| DIRECT PAINTING
online tutorial Summary
Join artist Sinead Lawless for a comprehensive guide to direct oil painting, or alla prima. This course is designed to build your skills from the ground up, beginning with the essential foundation of colour. You will learn to mix a vast spectrum of hues from a simple limited palette of Cyan, Magenta, and Yellow, understanding how to control hue, value, and chroma for perfect harmony. With your colours prepared, Sinead then guides you through the dynamic alla prima process on the canvas. You will progress from laying down a tonal imprimatura and blocking in major shapes, to blending edges and applying final impasto highlights. This course demystifies the entire process, empowering you to create vibrant, expressive paintings with confidence and a solid understanding of both colour and technique.
Course Preview
Course FAQ
-
Colour Theory & Mixing: How to mix a full spectrum of colours using a limited CMY (Cyan, Magenta, Yellow) palette and understand the properties of hue, value, and chroma.
Palette Preparation: The methodology for setting up your palette, managing your paint, and using different whites effectively.
The Imprimatura Technique: How to create a loose, tonal underpainting to establish light and shadow shapes on the canvas.
Strategic Blocking In: The process of laying down initial colour blocks, focusing on large shapes and correct values.
Expressive Brushwork: The use of different brushes to create textured, impasto marks that hold their shape and add energy.
The Art of Blending: When and how to blend edges between colours to soften forms while maintaining dynamic contrasts.
Adding Final Details: The technique of applying final highlights and details with thicker paint to enhance form and three-dimensionality.
-
Paints: Cyan (e.g., Phthalo Green), Magenta (e.g., Quinacridone Magenta), Yellow (e.g., Cadmium Yellow Pale), Titanium White, Zinc White.
Brushes: A variety of brushes, including synthetic brushes for control and bristle brushes for impasto work.
Surface: Canvas board or primed canvas (not paper).
Solvent: Odourless mineral spirits or turpentine.
Palette & Tools: Palette knife for mixing, a physical palette.
Rags & Roll: Blue roll (paper towels) or clean cotton rags.
Optional: Cotton buds for fine details.
-
Suitable for all levels - good understanding of the basic use of oil painting would be an advantage.
-
The course is composed of two videos, a combined total of 62 mins. Enjoy the benefit of being able to watch and follow along at your leisure for the duration of your access.
-
How does the 3-month access work?
This is a one-time payment that gives you access to the course for three months. There’s no automatic renewal - your access simply ends after the 3-month period.How do I access my course?
Once you’ve purchased the course, simply log in to your account at schoolhouseforart.com. Click on Account at the top right-hand side of the page, and your course will be available there.Can I extend my access after 3 months?
Yes! If you’d like continued access, you can purchase the course again at any time.What happens after 3 months?
Once the 3-month period is over, your access will expire. You won’t be charged again unless you choose to make another purchase.What if I only need access for a few weeks?
That’s fine. You’ll have access for the full 3 months, so you can move through the material at your own pace.Are refunds available?
We don’t offer refunds, but you’ll have access to the course for the full 3-month period you’ve paid for.Does this purchase give me access to other courses?
This purchase covers one individual course for 3 months. Other courses are available separately.Are there any technical requirements?
All you need is a stable internet connection and a modern web browser to enjoy the course.Can I share my access?
Course access is for individual use only and can’t be shared.Need help or having technical issues?
We’re happy to help. Just reach out to us at info@schoolhouseforart.com

CIARA MORAN |BUILDING A CERAMIC MUG
online tutorial Summary
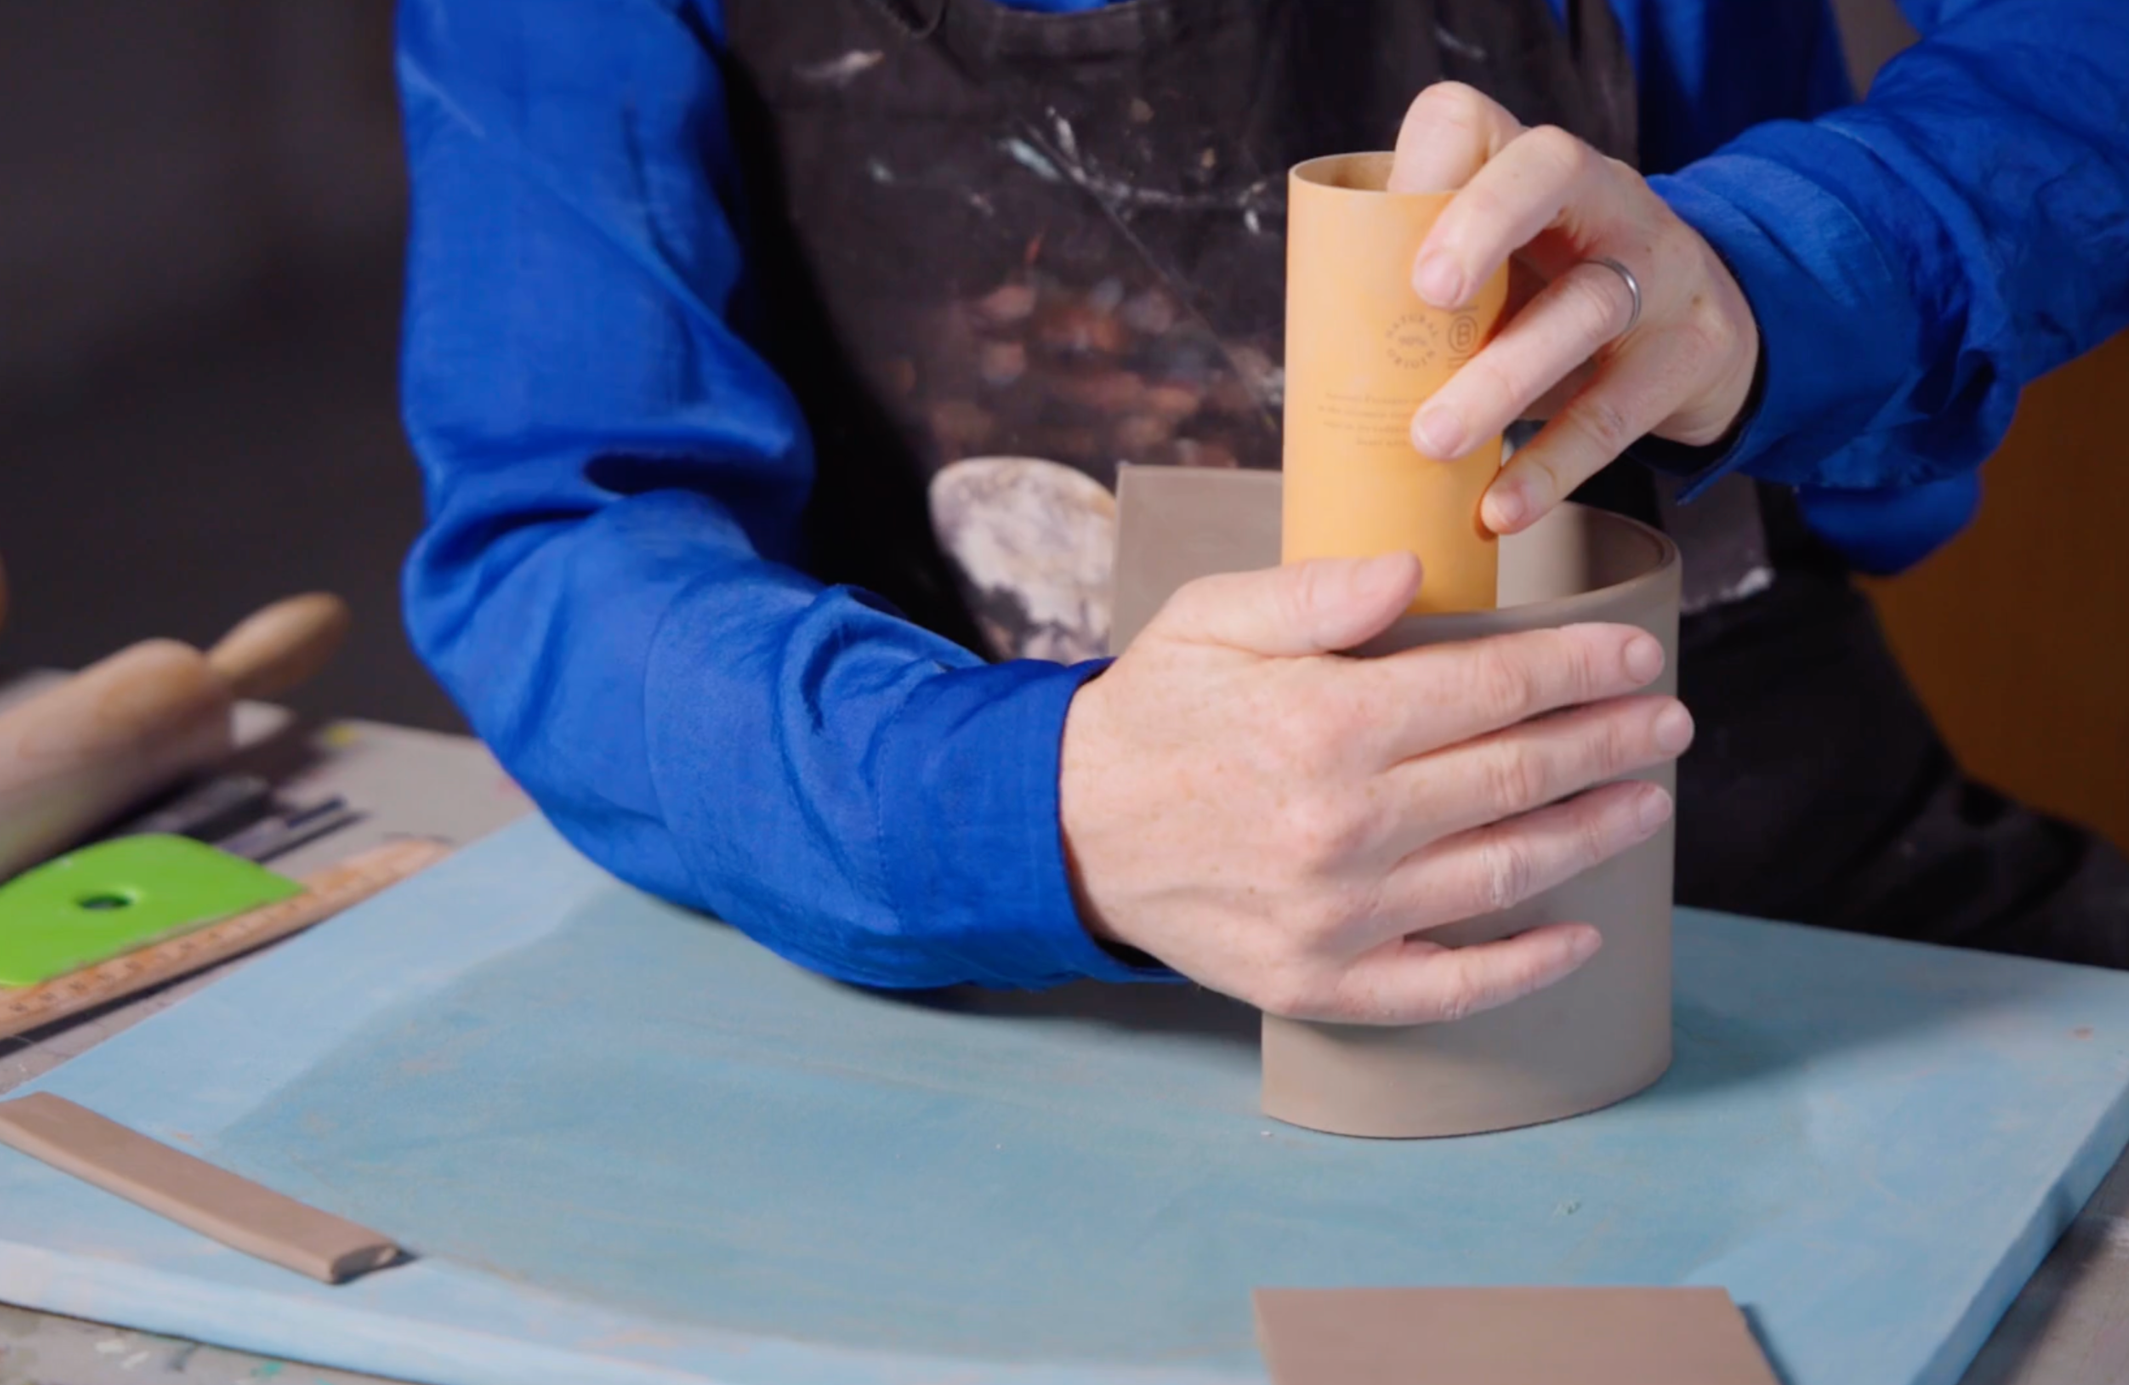
Join artist Ciara Moran, also known as The Wicklow Crafter, for a welcoming and practical course on hand-crafting your very own ceramic mug. This workshop is designed for absolute beginners, proving that you don't need a pottery wheel or a fancy studio to create beautiful, functional art. Ciara expertly guides you through the entire process, from rolling and cutting the clay to assembling and finishing your unique mug.
You will learn how to select the right type of clay and use simple, household items as effective pottery tools, making the craft accessible and affordable. The course emphasises a calm, methodical approach, ensuring you gain the confidence to build a robust mug that is both dishwasher and microwave safe. By the end, you will have not only a handmade mug to use every day but also the foundational skills to continue your ceramic journey at home.
Course Preview


Course FAQ
-
The Fundamentals of Hand-Building a Mug: The essential process of constructing a durable, everyday mug from scratch, using the slab-building technique.
Selecting the Right Clay Body: How to choose a durable, mid-range stoneware or porcelain clay that is ideal for creating functional, food-safe mugs.
Preparing & Managing Your Clay: The proper and safe way to wedge, roll, and compress your clay to achieve an even slab, free of air pockets.
Constructing the Core Components: The method for cutting out and assembling the three key pieces of a mug: the body slab, the base, and the handle.
The Principle of Score & Slip: How to effectively score clay surfaces and apply slip, the "clay glue", to ensure your mug holds together firmly through drying and firing.
Refining the Final Form: Essential techniques for smoothing seams, shaping the handle, and refining the rim for a comfortable, professional-looking finish.
Studio Safety & Best Practices: Important guidelines for maintaining a clean workspace, properly handling tools, and managing clay dust to protect your health and your work.
-
Clay: Stoneware clay, recommended for hand-building (e.g., Crank or White St. Thomas).
Glaze & Brush: A commercial brush-on glaze and a dedicated glaze brush.
Household Tools:
Rolling pin
Ruler, pencil, and paper (for templates)
Kitchen knife
Old paintbrush
Sponge
Two bowls (one for water)
Fork (for scoring)
An old credit card or loyalty card (as a rib)
Two 5-6mm thick guides (e.g., placemats, breadboards)
2 cylindrical objects : 1 small and 1 larger.
eg. Small cylinder could be a dowel or pencil. Larger cylinder could be the insert for a kitchen roll.Plastic bags
1 square meter of fabric or a plaster bat (as a work surface)
Scissors
sewing pin or needle
-
Suitable for all levels.
-
The course is composed of two videos, a combined total of 60 mins. Enjoy the benefit of being able to watch and follow along at your leisure for the duration of your access.
-
How does the 3-month access work?
This is a one-time payment that gives you access to the course for three months. There’s no automatic renewal - your access simply ends after the 3-month period.How do I access my course?
Once you’ve purchased the course, simply log in to your account at schoolhouseforart.com. Click on Account at the top right-hand side of the page, and your course will be available there.Can I extend my access after 3 months?
Yes! If you’d like continued access, you can purchase the course again at any time.What happens after 3 months?
Once the 3-month period is over, your access will expire. You won’t be charged again unless you choose to make another purchase.What if I only need access for a few weeks?
That’s fine. You’ll have access for the full 3 months, so you can move through the material at your own pace.Are refunds available?
We don’t offer refunds, but you’ll have access to the course for the full 3-month period you’ve paid for.Does this purchase give me access to other courses?
This purchase covers one individual course for 3 months. Other courses are available separately.Are there any technical requirements?
All you need is a stable internet connection and a modern web browser to enjoy the course.Can I share my access?
Course access is for individual use only and can’t be shared.Need help or having technical issues?
We’re happy to help. Just reach out to us at info@schoolhouseforart.com
METTE O’CONNOR | ANTICLASTIC RAISING
online tutorial Summary
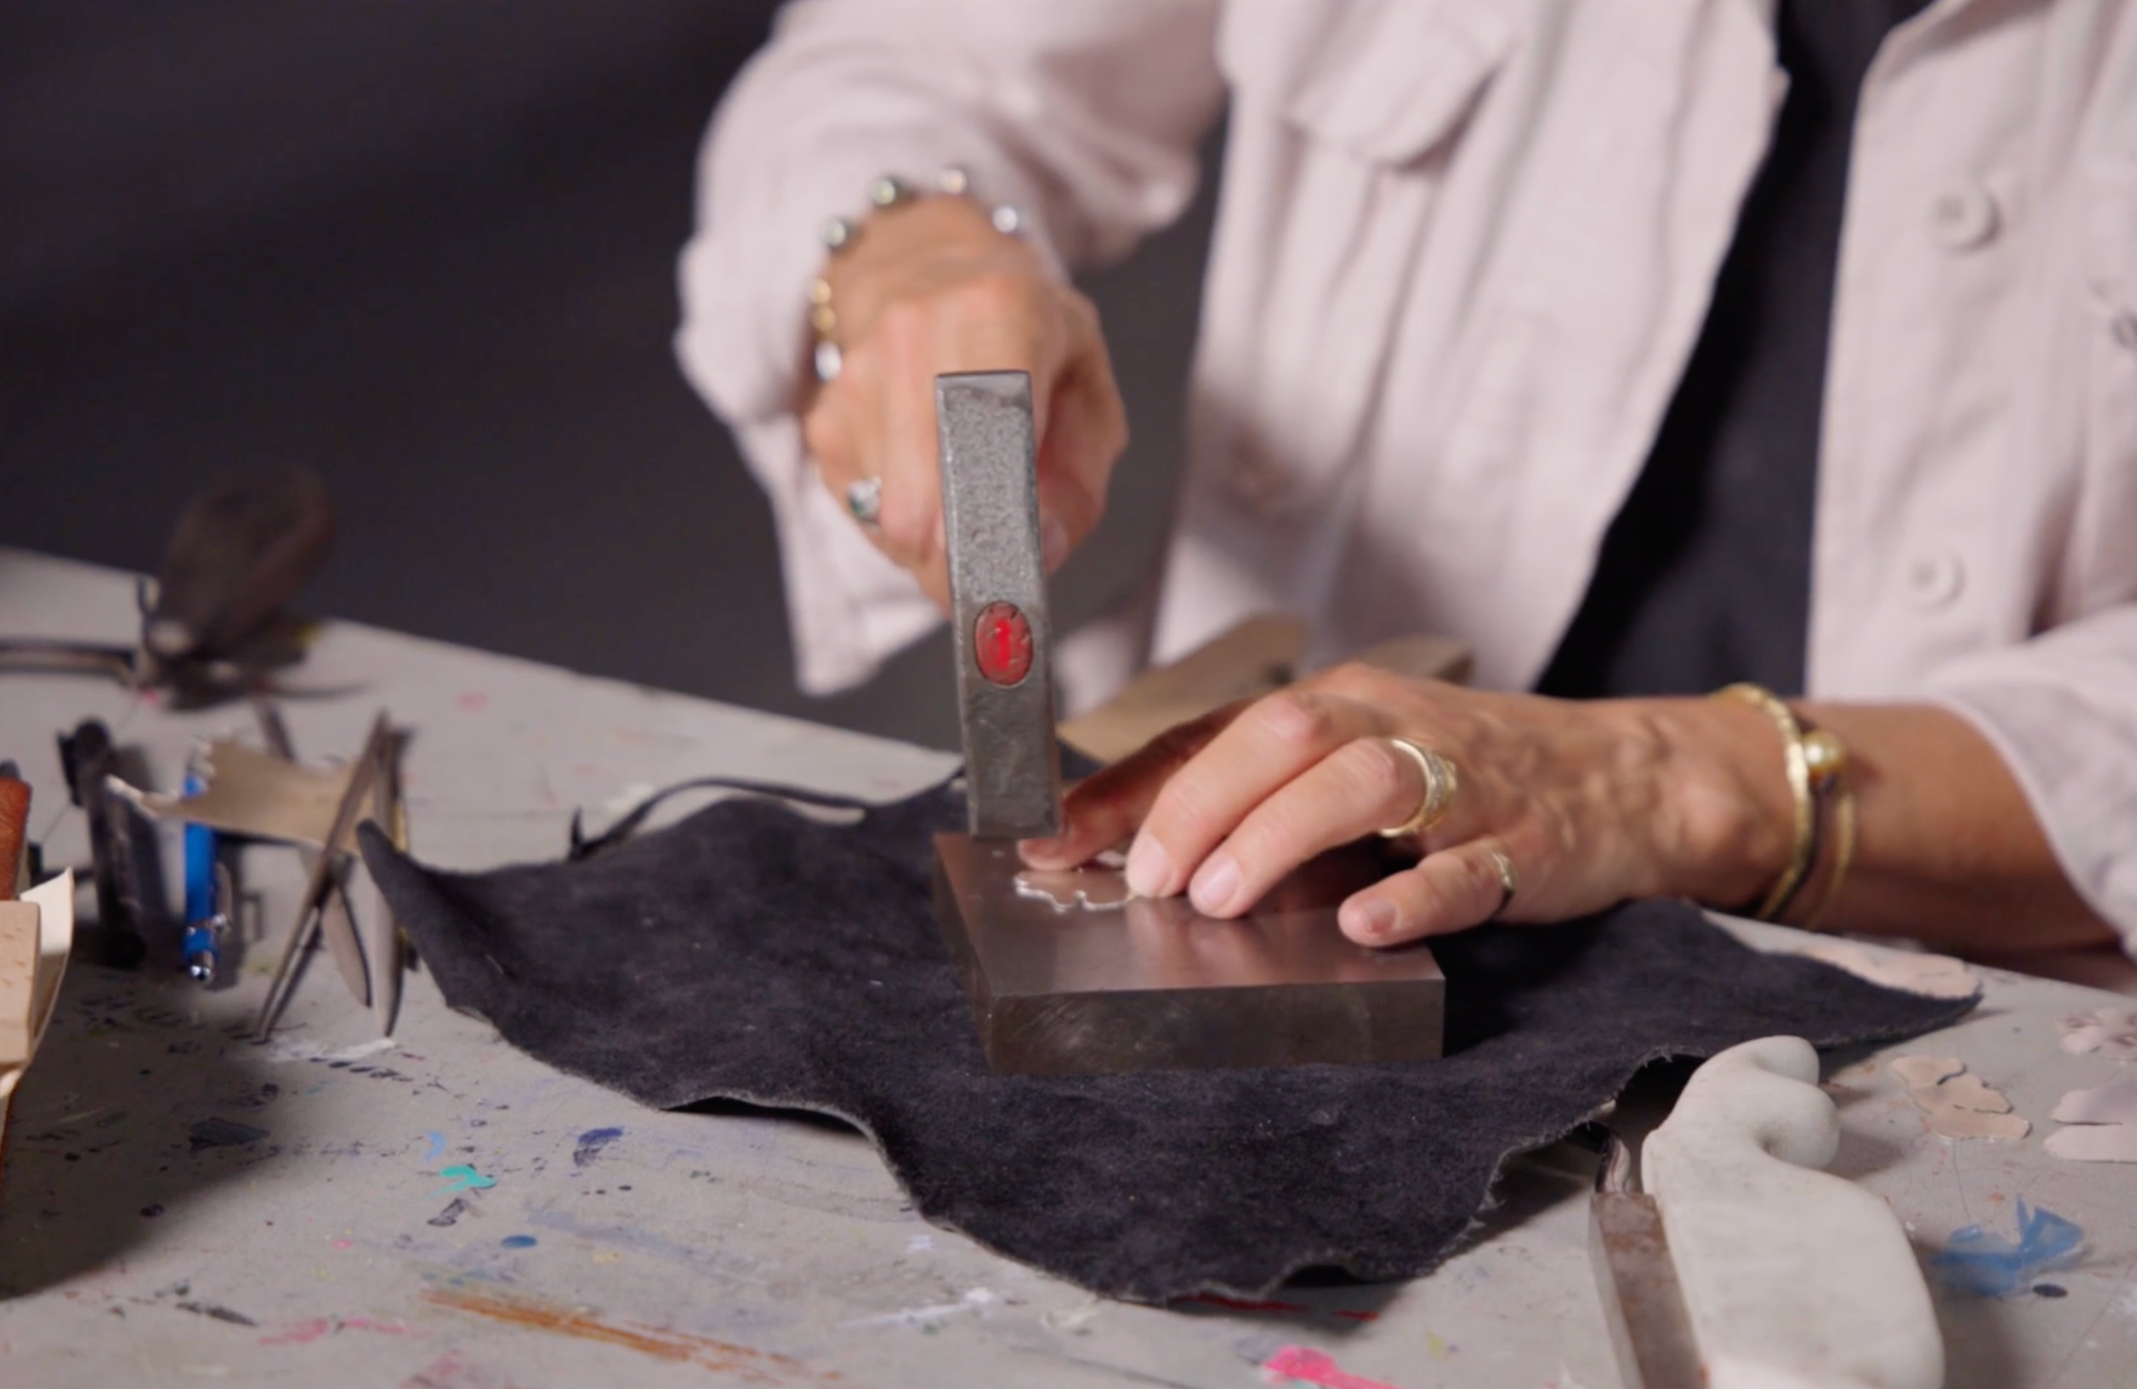
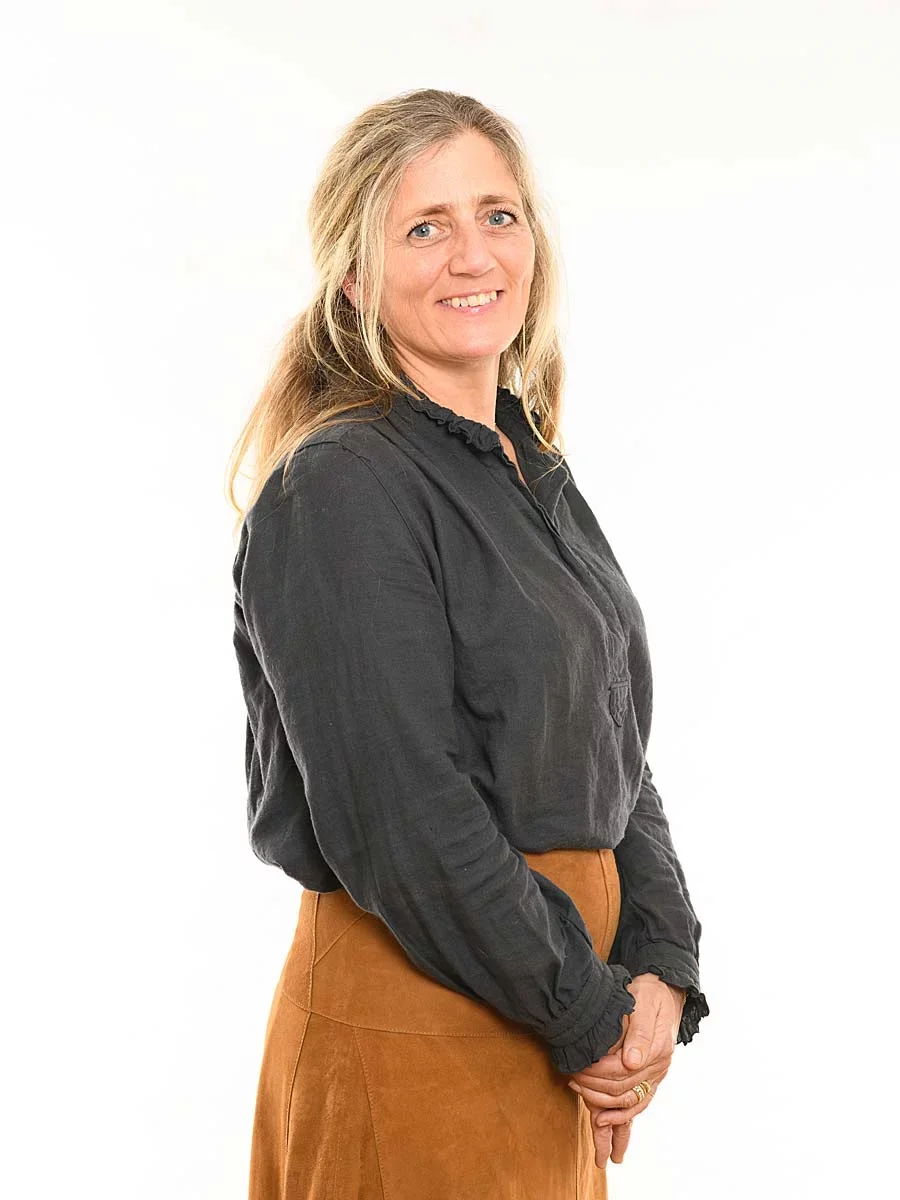
Join master jeweller Mette O'Connor from Amok Jewellery for a fascinating introduction to the ancient art of anti-clastic raising. In this course, you will learn to transform a flat sheet of silver into a beautiful, three-dimensional flower pendant. Mette guides you through the entire process with a calm and encouraging approach, making this intricate metal-smithing technique accessible and enjoyable.
You will start by designing and cutting your unique floral shape, then discover the magic of shaping metal using hammers and specialised stakes. Mette emphasises an intuitive and organic process, teaching you how to "listen" to the metal as you create curves in two opposite directions. By the end of this workshop, you will have not only a unique piece of jewellery but also a foundational skill in a traditional craft, empowering you to create elegant, sculptural forms from metal.
Course Preview


Course FAQ
-
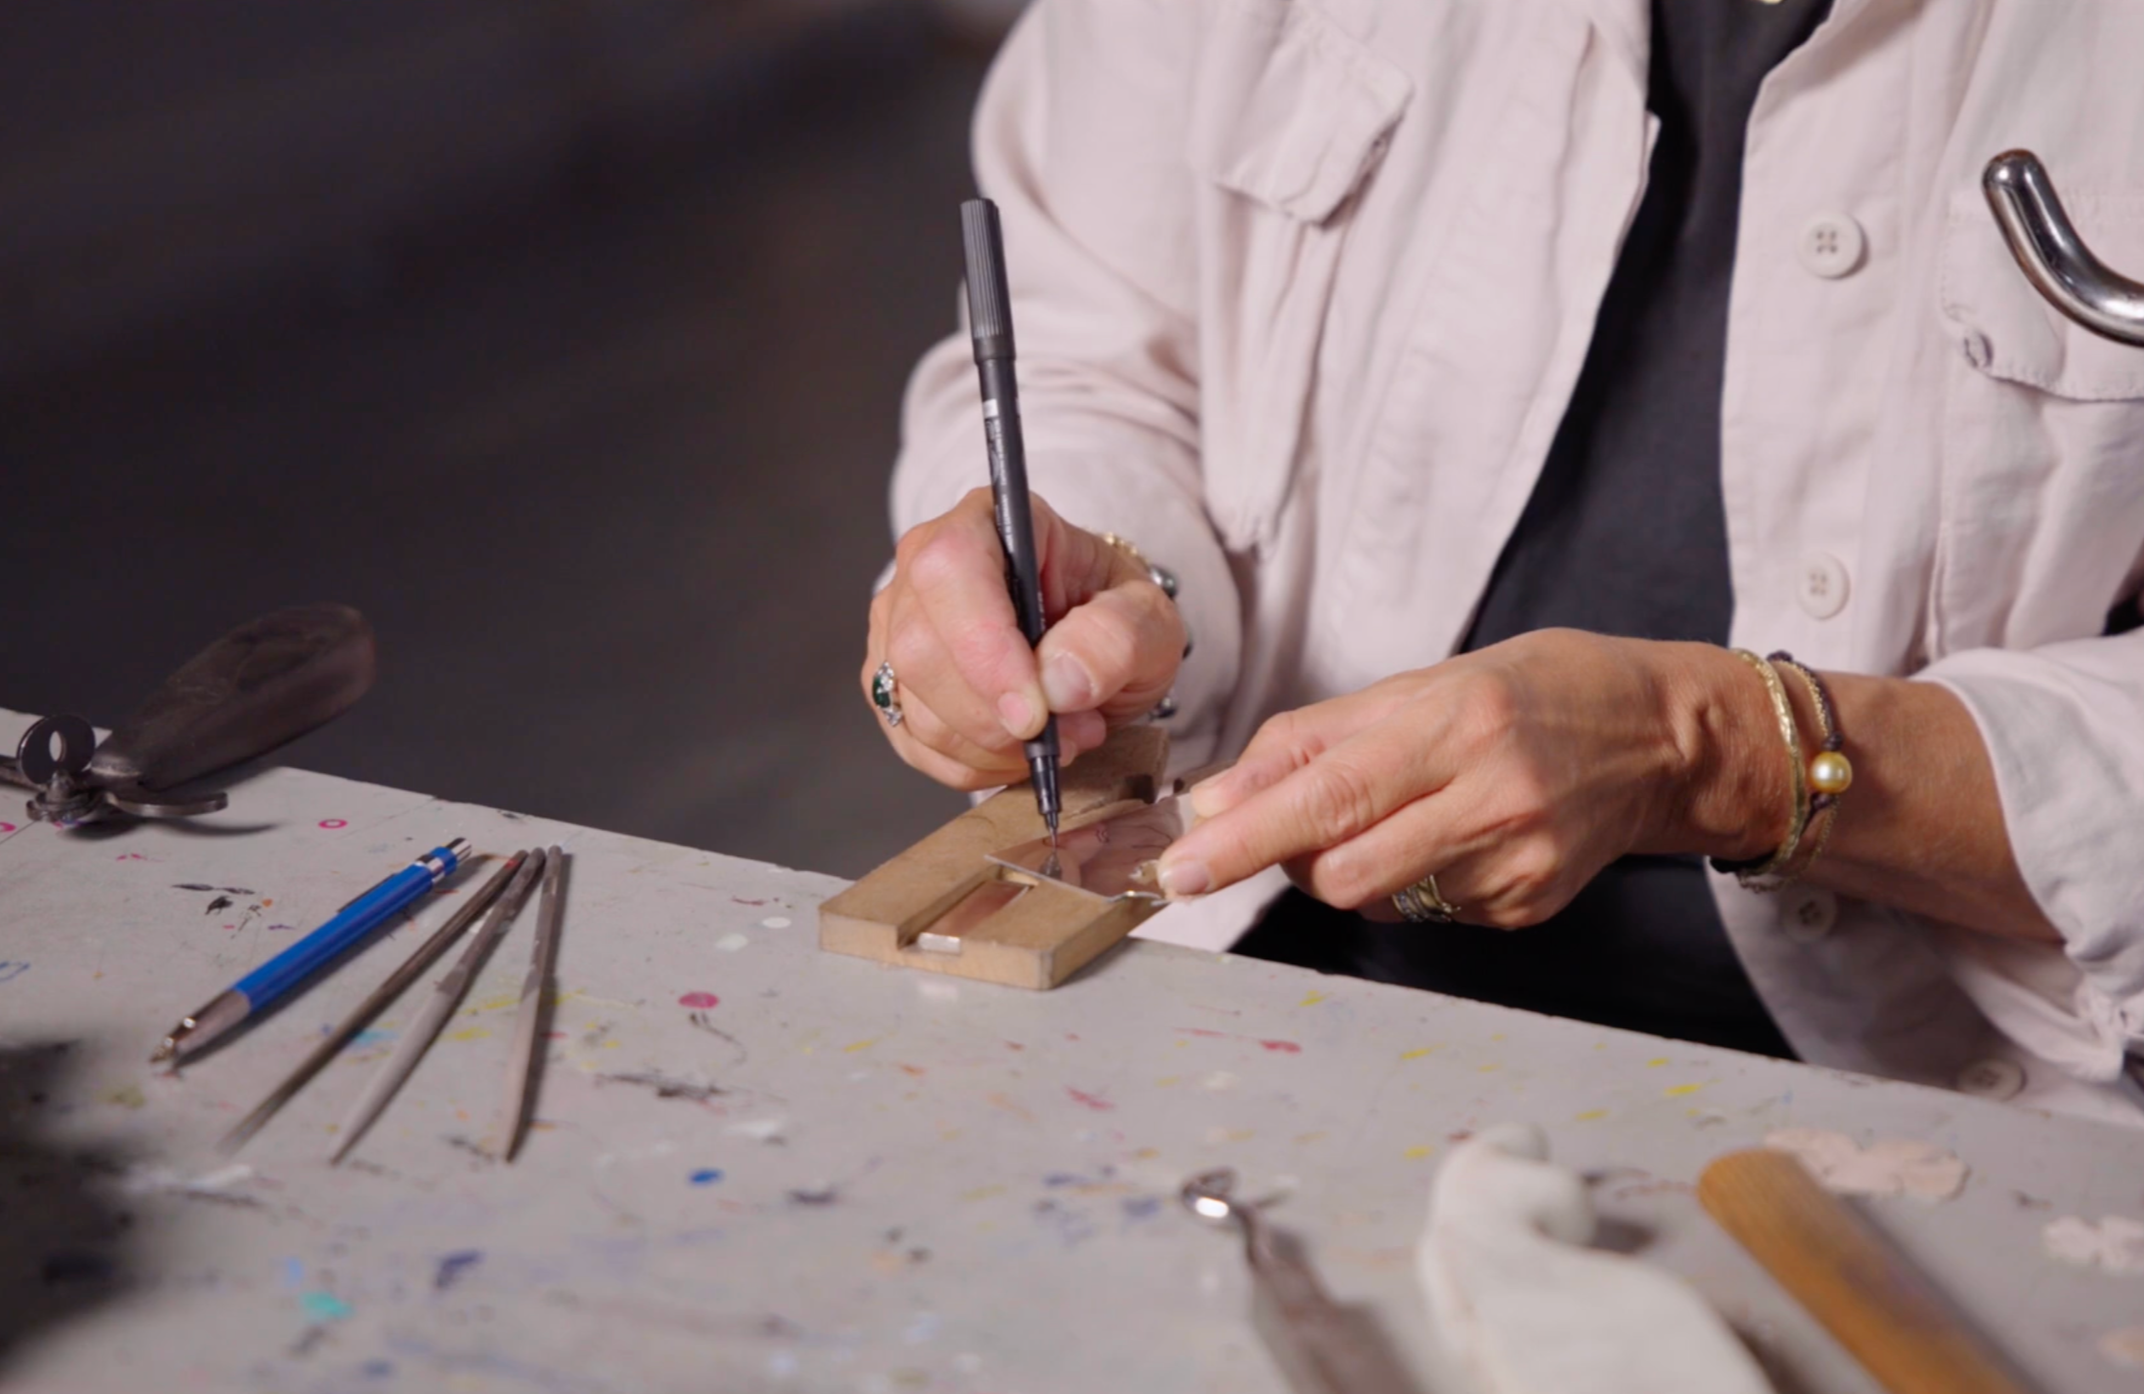
Design & Layout: How to draw and transfer an organic, floral design onto a metal sheet using a marker and scribe.
Precision Cutting: The technique of using a jeweler's piercing saw to safely and accurately cut out your metal shape.
Preparing the Metal: How to file sharp edges for safety and comfort before the shaping process begins.
Adding Decorative Texture: How to use different hammers to create patterned textures on the flat metal before raising.
The Core Technique: Anti-Clastic Raising: The process of using hammers and stakes to create smooth, three-dimensional curves in two opposite directions.
Shaping & Forming: The methodology of starting with gentle curves and progressively working towards tighter, more dramatic shapes without buckling the metal.
Organic Design Refinement: How to twist and adjust the metal by hand and hammer to create a natural, flowing final form.
Finishing & Texturing: How to use a scouring pad to create a matte finish that provides contrast and highlights the form.
-
Metal: A thin sheet of silver (0.5mm is ideal) or copper.
Design & Cutting Tools:
Permanent marker and a scribe (a very pointy needle/awl).
Jeweller's piercing saw and blades.
A jeweller's bench peg or a piece of wood to cut over.
Files for smoothing edges.
Shaping Tools:
A selection of hammers (e.g., a polished steel hammer for texturing, a plastic/rubber mallet, and a steel hammer for finer shaping).
Anti-clastic raising stakes (or any rounded, hard surface like specific anvils).
Finishing Touches:
An old scouring pad or sandpaper for adding texture.
(Optional) Drill and wire for assembling into a pendant.
-
Suitable for all levels.
-
The course is composed of one video, a total of 23 mins. Enjoy the benefit of being able to watch and follow along at your leisure for the duration of your access.
-
How does the 3-month access work?
This is a one-time payment that gives you access to the course for three months. There’s no automatic renewal - your access simply ends after the 3-month period.How do I access my course?
Once you’ve purchased the course, simply log in to your account at schoolhouseforart.com. Click on Account at the top right-hand side of the page, and your course will be available there.Can I extend my access after 3 months?
Yes! If you’d like continued access, you can purchase the course again at any time.What happens after 3 months?
Once the 3-month period is over, your access will expire. You won’t be charged again unless you choose to make another purchase.What if I only need access for a few weeks?
That’s fine. You’ll have access for the full 3 months, so you can move through the material at your own pace.Are refunds available?
We don’t offer refunds, but you’ll have access to the course for the full 3-month period you’ve paid for.Does this purchase give me access to other courses?
This purchase covers one individual course for 3 months. Other courses are available separately.Are there any technical requirements?
All you need is a stable internet connection and a modern web browser to enjoy the course.Can I share my access?
Course access is for individual use only and can’t be shared.Need help or having technical issues?
We’re happy to help. Just reach out to us at info@schoolhouseforart.com

ÁINE DIVINE | WATERCOLOUR PORTRAITURE
online tutorial Summary
In this online course, artist Áine Divine guides students through the process of painting an expressive watercolour portrait from a live model. She introduces an approachable method using wide, flat brushes that make it easy to create bold, fluid strokes and capture the essence of a subject. Students will learn how to mix a beautiful range of skin, shadow, and hair tones from a simple palette of colours.
A key focus of the course is building confidence; Áine demonstrates helpful techniques for lifting paint to correct and adjust the painting, showing that mistakes are simply part of the process. Áine creates a supportive environment that emphasises the joy of painting, teaches students how to relax, find a steady rhythm, and trust their observational skills.
This course is designed for anyone looking to explore portraiture in a loose and free way, providing both the technical skills and the encouragement needed to create a portrait that feels alive.
Course Preview


Course FAQ
-
A Unique Brush Technique: How to use wide, flat brushes to create bold, expressive strokes and capture the essence of a subject.
Simple Colour Mixing: How to mix a range of skin tones, shadows, and hair colours from a limited and manageable palette.
Correcting with Confidence: Techniques for lifting wet and dry paint to correct mistakes, reclaim highlights, and adjust your painting.
The Artist's Mindset: How to relax, observe your subject, and develop a confident rhythm between looking and painting.
Portrait Fundamentals: An approach to understanding the planes of the face and placing features to achieve a likeness.
-
Paper & Palette
Watercolour Paper: Áine specifically recommends Bockingford paper because it allows for easy lifting and correction of paint.
Watercolour Palette: A palette with large wells, specifically one that can accommodate a 2-inch brush for easy paint lifting and mixing.
Test Paper: A separate piece of paper (same type as the main sheet) for testing colour consistency and behaviour on a vertical surface.
Brushes
Primary Brushes (Rosemary & Co. Series S 222 - "Áine Divine Set"):
2-inch flat brush
1.5-inch flat brush
1-inch flat brush
Lifting/Craft Brushes (Royal & Langnickel):
Springy, cheaper craft brushes (1-inch and 3/4-inch are mentioned) used for lifting out colour and correcting edges.
Small Detail Brush:
A quarter-inch brush for fine details like the iris and eyelashes.
Paints (Artist's Watercolour Tubes)
Áine uses a limited palette, mixing colours to create a wide range of skin tones, hair colours, and shadows.
Van Dyke Brown
Ultramarine Blue
Burnt Sienna
Cadmium Red
Sap Green
Alizarin Crimson
Viridian Green
Cerulean Blue
Cadmium Orange
Lemon Yellow
Water & Miscellaneous
Water Container: For rinsing brushes.
Kitchen Paper / Paper Towels: Essential for leaching water out of brushes, testing colour, and lifting wet paint.
-
Suitable for all levels - good understanding of the basic use of watercolour would be an advantage.
-
The course is composed of two videos, a combined total of 65 mins. Enjoy the benefit of being able to watch and follow along at your leisure for the duration of your access.
-
How does the 3-month access work?
This is a one-time payment that gives you access to the course for three months. There’s no automatic renewal - your access simply ends after the 3-month period.How do I access my course?
Once you’ve purchased the course, simply log in to your account at schoolhouseforart.com. Click on Account at the top right-hand side of the page, and your course will be available there.Can I extend my access after 3 months?
Yes! If you’d like continued access, you can purchase the course again at any time.What happens after 3 months?
Once the 3-month period is over, your access will expire. You won’t be charged again unless you choose to make another purchase.What if I only need access for a few weeks?
That’s fine. You’ll have access for the full 3 months, so you can move through the material at your own pace.Are refunds available?
We don’t offer refunds, but you’ll have access to the course for the full 3-month period you’ve paid for.Does this purchase give me access to other courses?
This purchase covers one individual course for 3 months. Other courses are available separately.Are there any technical requirements?
All you need is a stable internet connection and a modern web browser to enjoy the course.Can I share my access?
Course access is for individual use only and can’t be shared.Need help or having technical issues?
We’re happy to help. Just reach out to us at info@schoolhouseforart.com